
How to set-up your Infobip Cart Abandonment so you can trigger emails to your drop-offs. You can learn more about TickX Cart Abandonment here.
Note: Before you get started you need ensure that your from email is approved and authenticated; Verify Email Domain.
1. Go to Cart Abandonment > Integration Settings > Infobip > Activate Integration
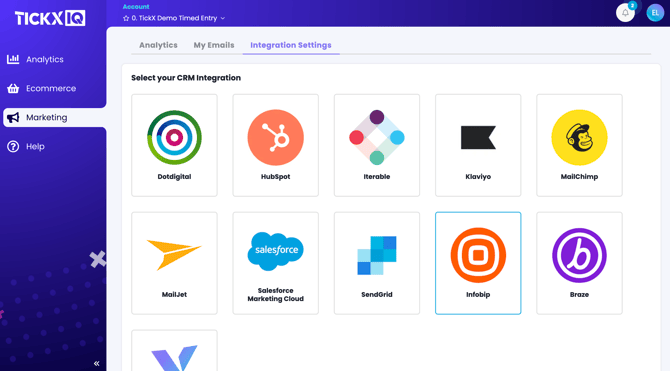
2. Add integration settings details
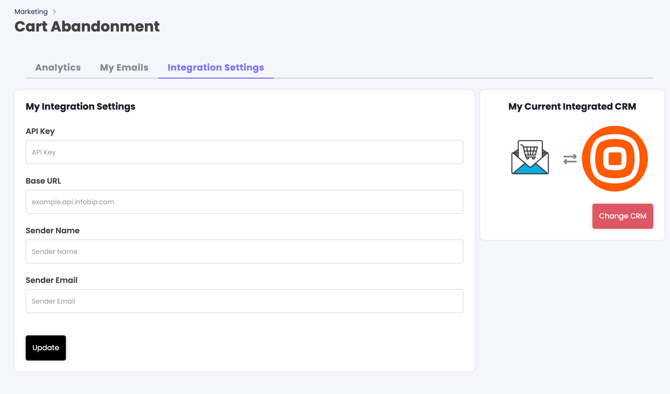
3. Enter API Key
- Login to Infobip
- Go to Developer Tools > API Keys
- Create API Key
-1.png?width=670&height=325&name=image%20(14)-1.png)
- Enable the following EMAIL & SMS Scopes when creating the Key:
- email:logs:read
- email:manage
- email:message:send
- emails:template:manage
- sms:logs:read
- sms:manage
- sms:message:send
-1.png?width=670&height=463&name=image%20(15)-1.png)
-1.png?width=670&height=463&name=image%20(16)-1.png)
- A new API Key will be created → add this into API Key field in TickX IQ
4. Add base URL
- Go to https://www.infobip.com/docs/api
- Copy Base URL
-1.png?width=670&height=286&name=image%20(21)-1.png)
5. Add Sender Name - This is the 'From Name' you would like your emails to come from
6. Add Sender Email - This is the 'From Email' you would like your emails to come from
7. Press Update. Your Integration is now set-up.
8. Verify your domain in Infobip
9. Add a New Email: My Emails > Add Email
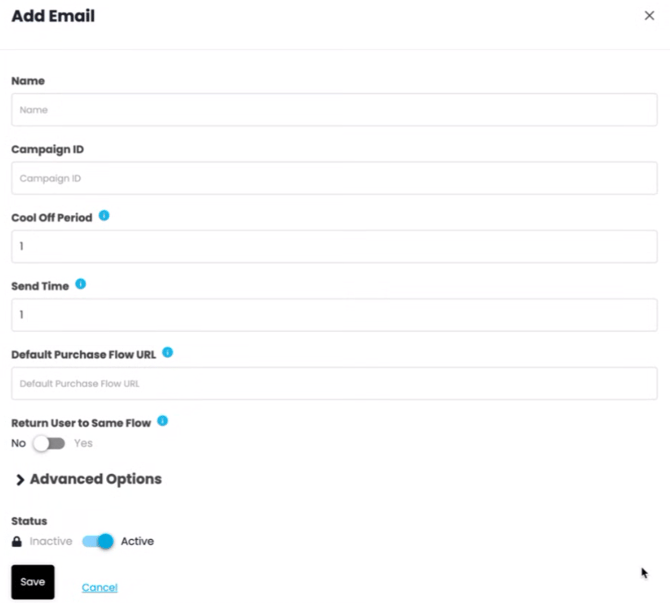
10. Give your email a name. As you can have multiple cart abandon emails set-up, this is a way to differentiate the email trigger list. E.g. Cart Abandon - All Users
- In Infobip, save your template & within the URL get the template ID
-1.webp?width=670&height=132&name=image%20(25)-1.webp)
- Copy ID → add this into Campaign ID field in TickX IQ
- Add Preview Text
- Add Subject & Preview Text
- Add Cool Off period This is the number of days to wait before the same contact is sent the initial email again - preventing multiple emails if someone visits and drops-off multiple times
- Add Send Time This is how many hours you would like to trigger the email either after drop-off
- Add Default Purchase Flow URL This is the Purchase Flow you would like your drop-offs to be directed to from the CTA button
- Return User to Same Flow If you toggle this setting on then drop-offs will be directed back to the specific flow that they left when they click the CTA button
- We have some essential merge fields that need to be added into your email template in Infobip so that we can report effectively and customers are presented with the relevant flow.
{{TICKX_TRACK_PIXEL}}This is to ensure we can report on the Cart Abandon data effectively. We recommend to add this as hidden text at the bottom of the template.{{FLOW_URL}}Add this merge fields as your CTA button link/URL.{{TICKX_UNSUBSCRIBE_URL}}This allows drop-offs to opt-out of receiving any further Cart Abandon notifications
- We have some additional merge fields which can be added to your templates to provide some individualised information to your customers.
{{FNAME}}{{LNAME}}{{BOOKING_DATE}}{{BOOKING_NAME}}{{BOOKING_VENUE}}{{TICKET_TYPES}}
11. Advanced Options
-
You can segment who receives content based upon our Advanced Options
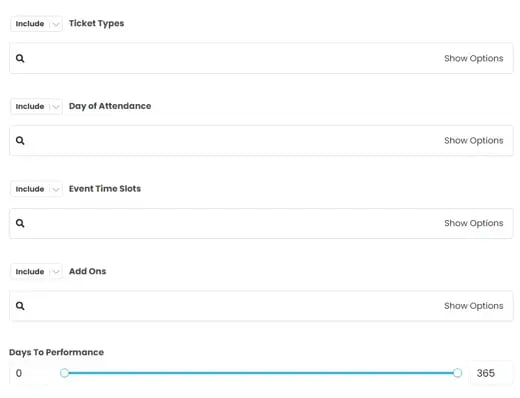
For example; you might have different content to send customers who dropped-out of an event that is happening in one day attending from those looking to attend in 6 months. These advanced options allow you to trigger more specified content to your drop-offs.
12. If you want to send a test before toggling to Active > Save > Go to Actions > Send Test Email
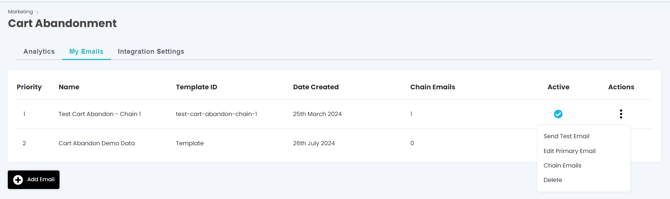
- Enter the email you would like to send the test to
- If the email is set-up correctly you will get a copy of the email in your inbox
- If there are any issues you will receive a TickX email highlighting the error