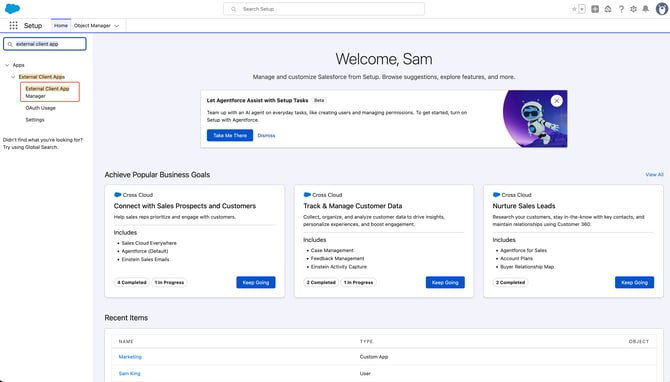
Step One: Navigate to the cog in the top right of Salesforce and go to Setup.
Step Two: Search in the Quick Find box in the top left for External Client App Manager and select the External Client App Manager option under Apps; External Client Apps
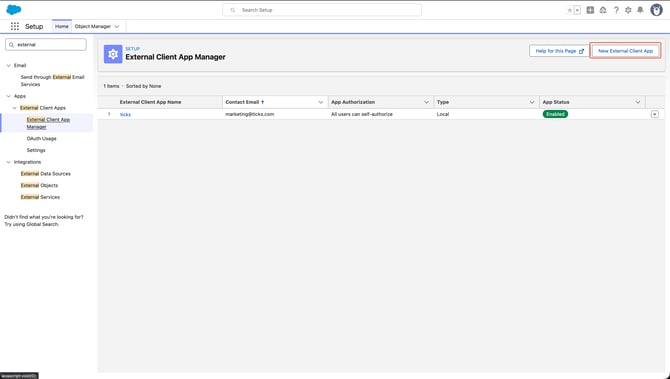
Step Three: Click New External Client App in the top right.
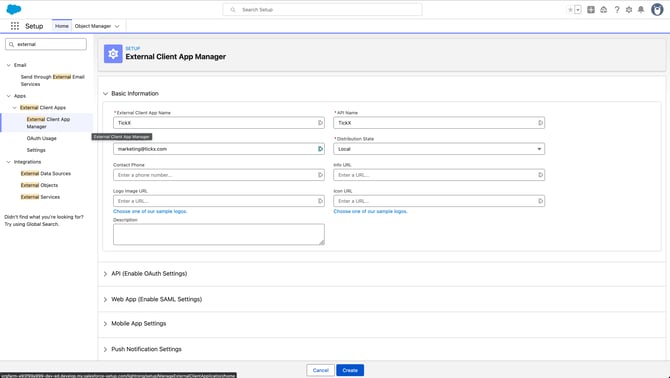
Step Four: Add the following Basic information:
a. External Client App Name: TickX
b. API Name: TickX
c. Contact Email: **marketing@tickx.co.uk**
d. Distribution State: Local
e. Leave all other fields BLANK
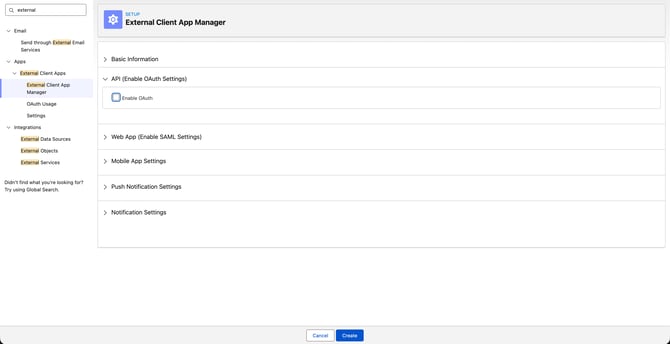
Step Five: Expand API (Enable OAuth Settings)
- Tick Enable OAuth
-
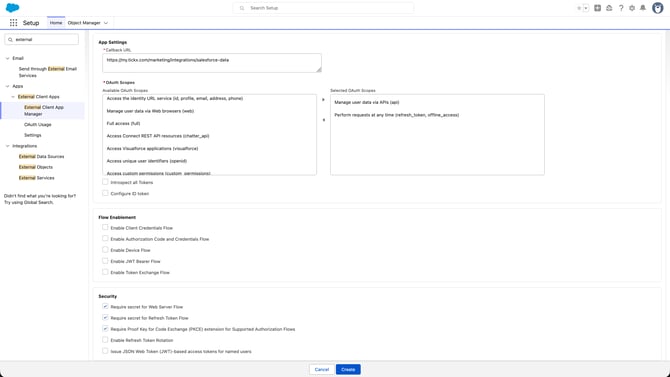
Add Callback URL
This is your TickX IQ URL that you use to log into TickX with the following /marketing/integrations/salesforce-data added. For example if your log-in to TickX IQ is on https://my.tickx.com then in this field you will enter ***https://my.tickx.com/marketing/integrations/salesforce-data***
-
Select the following values under OAuth Scopes:
- Manage user data via APIs (api)
- Perform requests at any time (refresh_token, offline_access
-
No other changes in this section is required, the following fields should be ticked:
- Require secret for Web Server Flow
- Require secret for Refresh Token Flow
- Require Proof Key for Code
- Exchange (PKCE) extension for Supported Authroization Flows
-
Once complete > Press CREATE
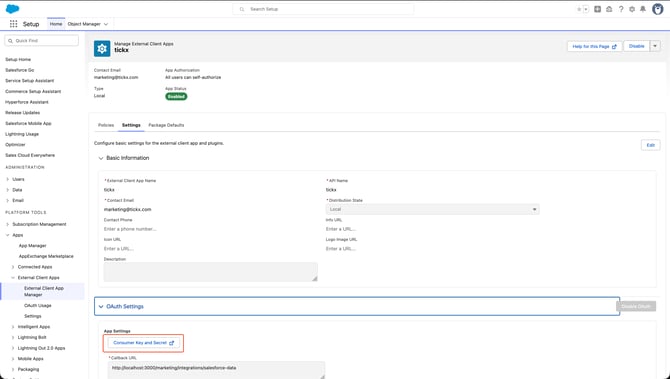
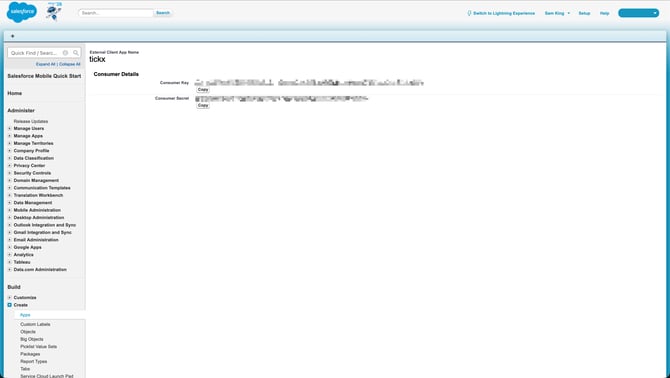
Step Six: Navigate to the newly created TickX external client app.
Go to Settings > 0Auth Settings > Click the button Consumer Key & Secret
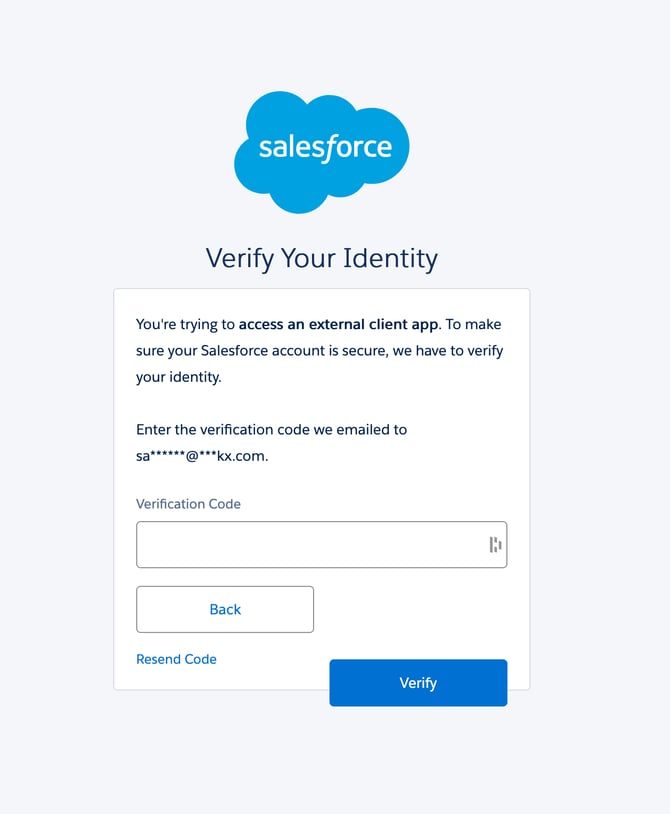
Step Seven: Verify your identity, following the onscreen prompts
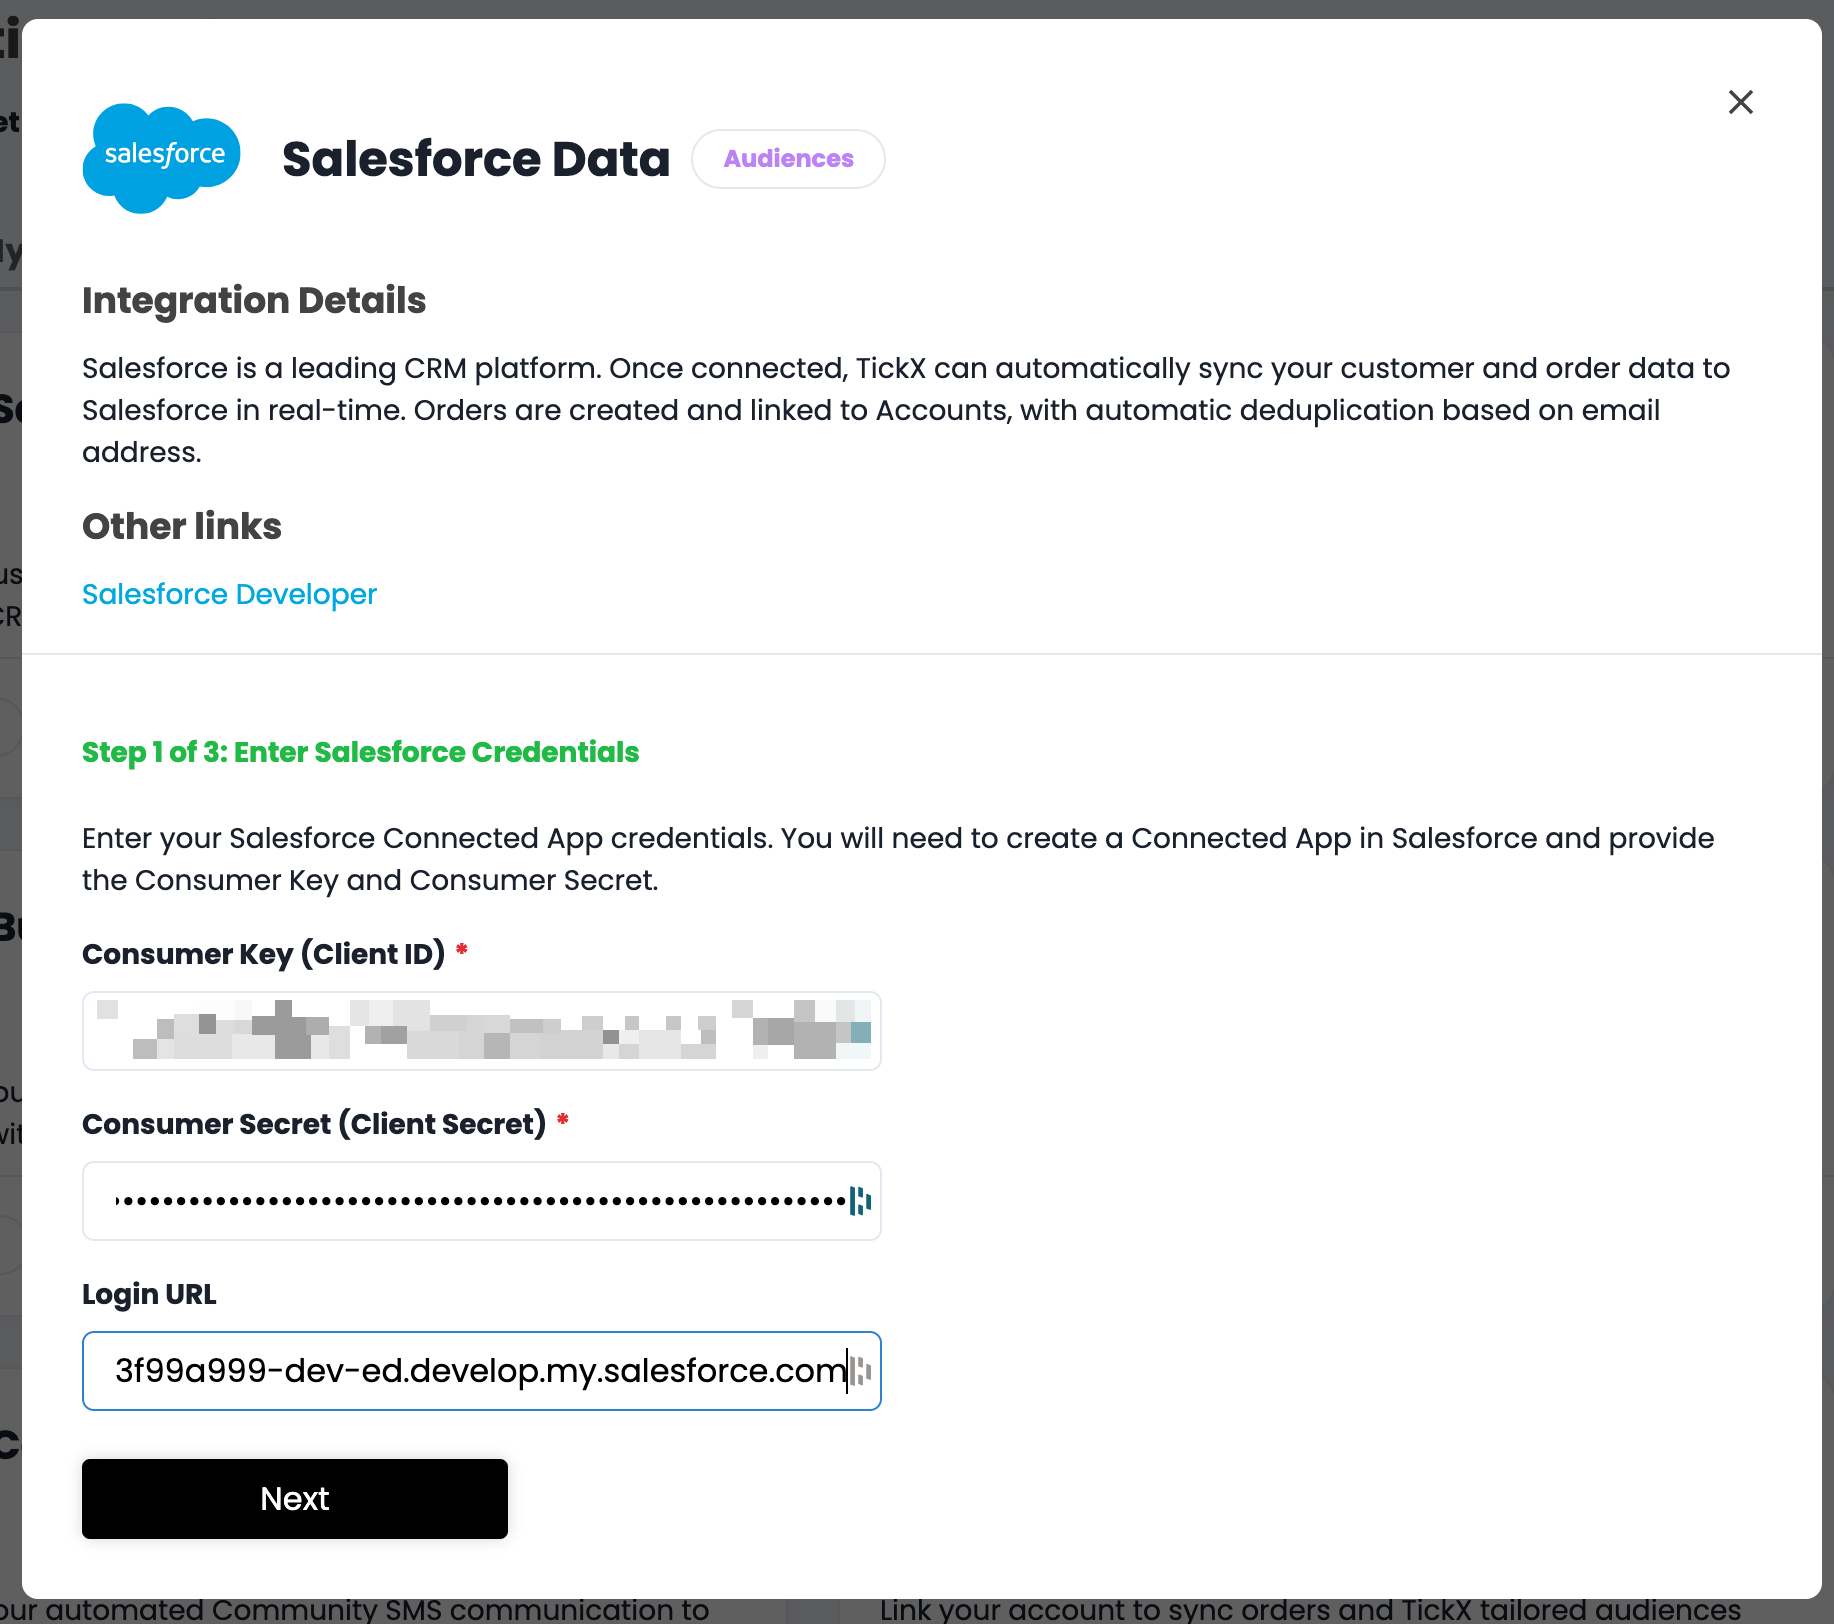
Step Eight: Once verified you'll be greeted with a page containing a Consumer Key and Consumer Secret copy these two values across to the matching fields inside of TickX
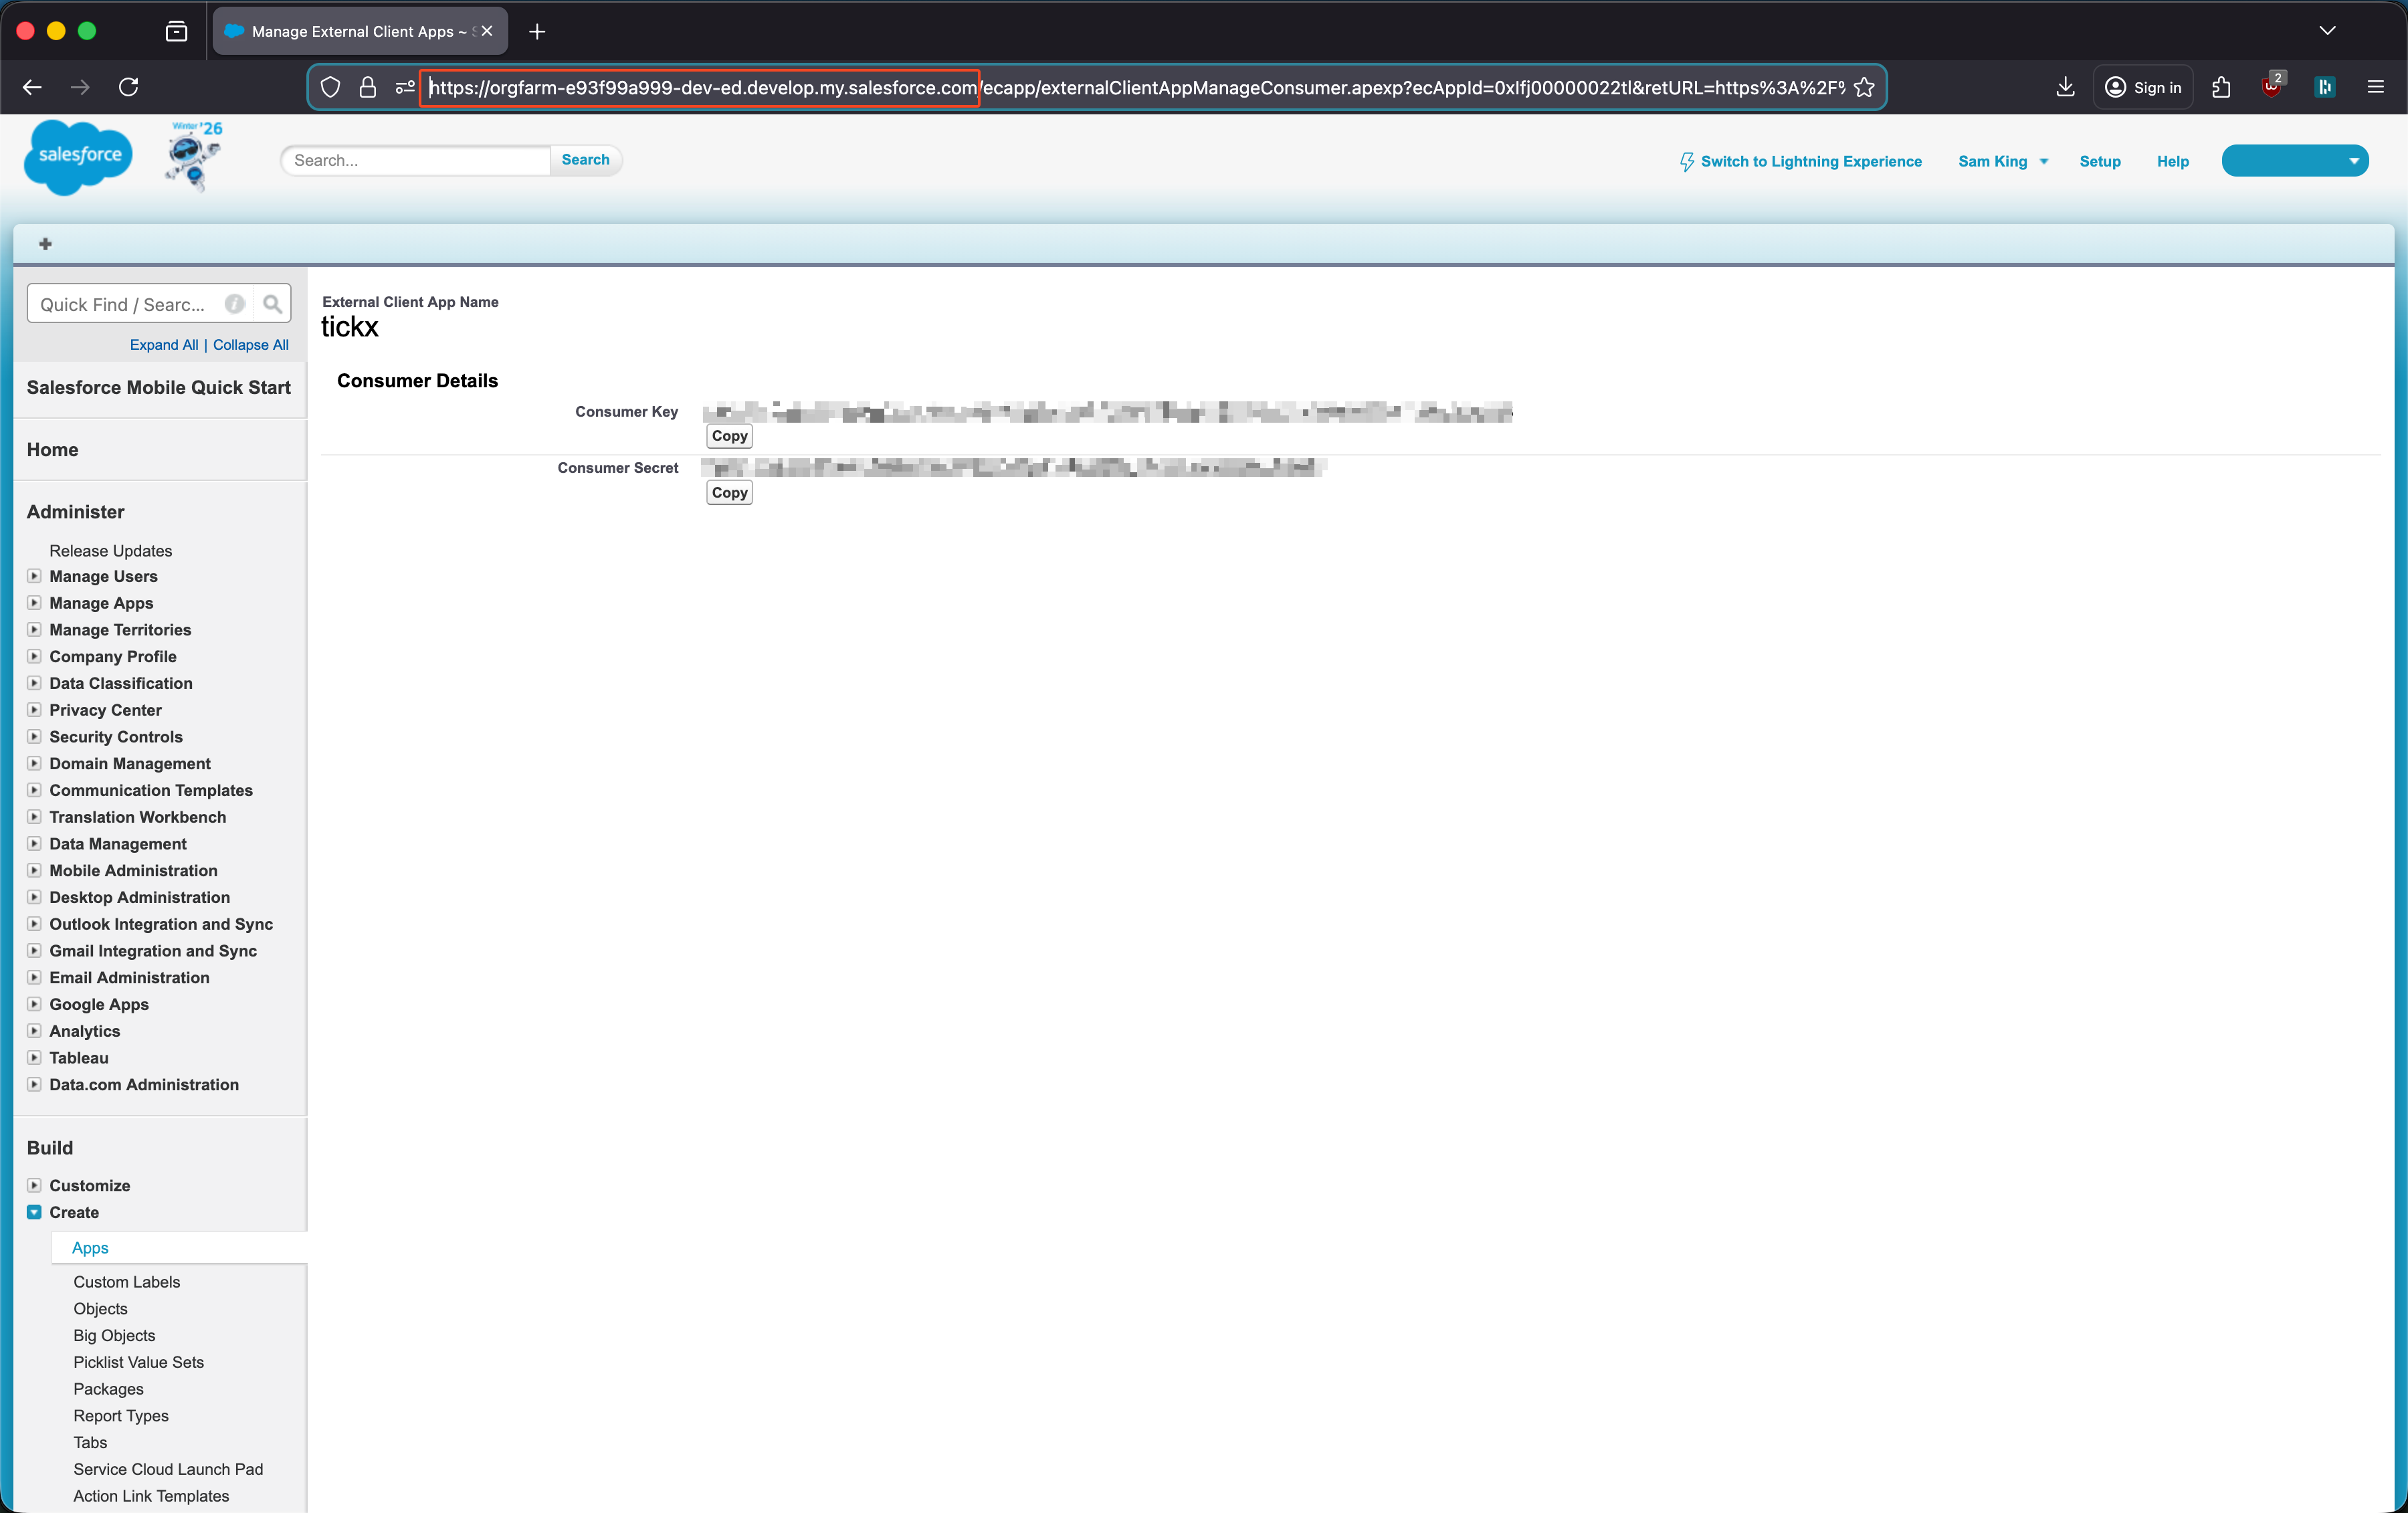
Please Note: When configuring inside of TickX If you are not using a standard Salesforce instance or authentication fails; the log-in URL is adjustable. To make this change, go to the page with your consumer key/secret on it and copy the URL from the browser at the top. Remove anything after the .com and paste in the Login URL field inside of TickX. See the image below for an example of the text which should be selected, in this example it should be https://orgfarm-e93f99a999-dev-ed.develop.my.salesforce.com
Step Nine: TickX fields are populated > go to the next step of the authentication flow
Step Ten: Click Connect to Salesforce button and follow the steps on screen to authenticate TickX.
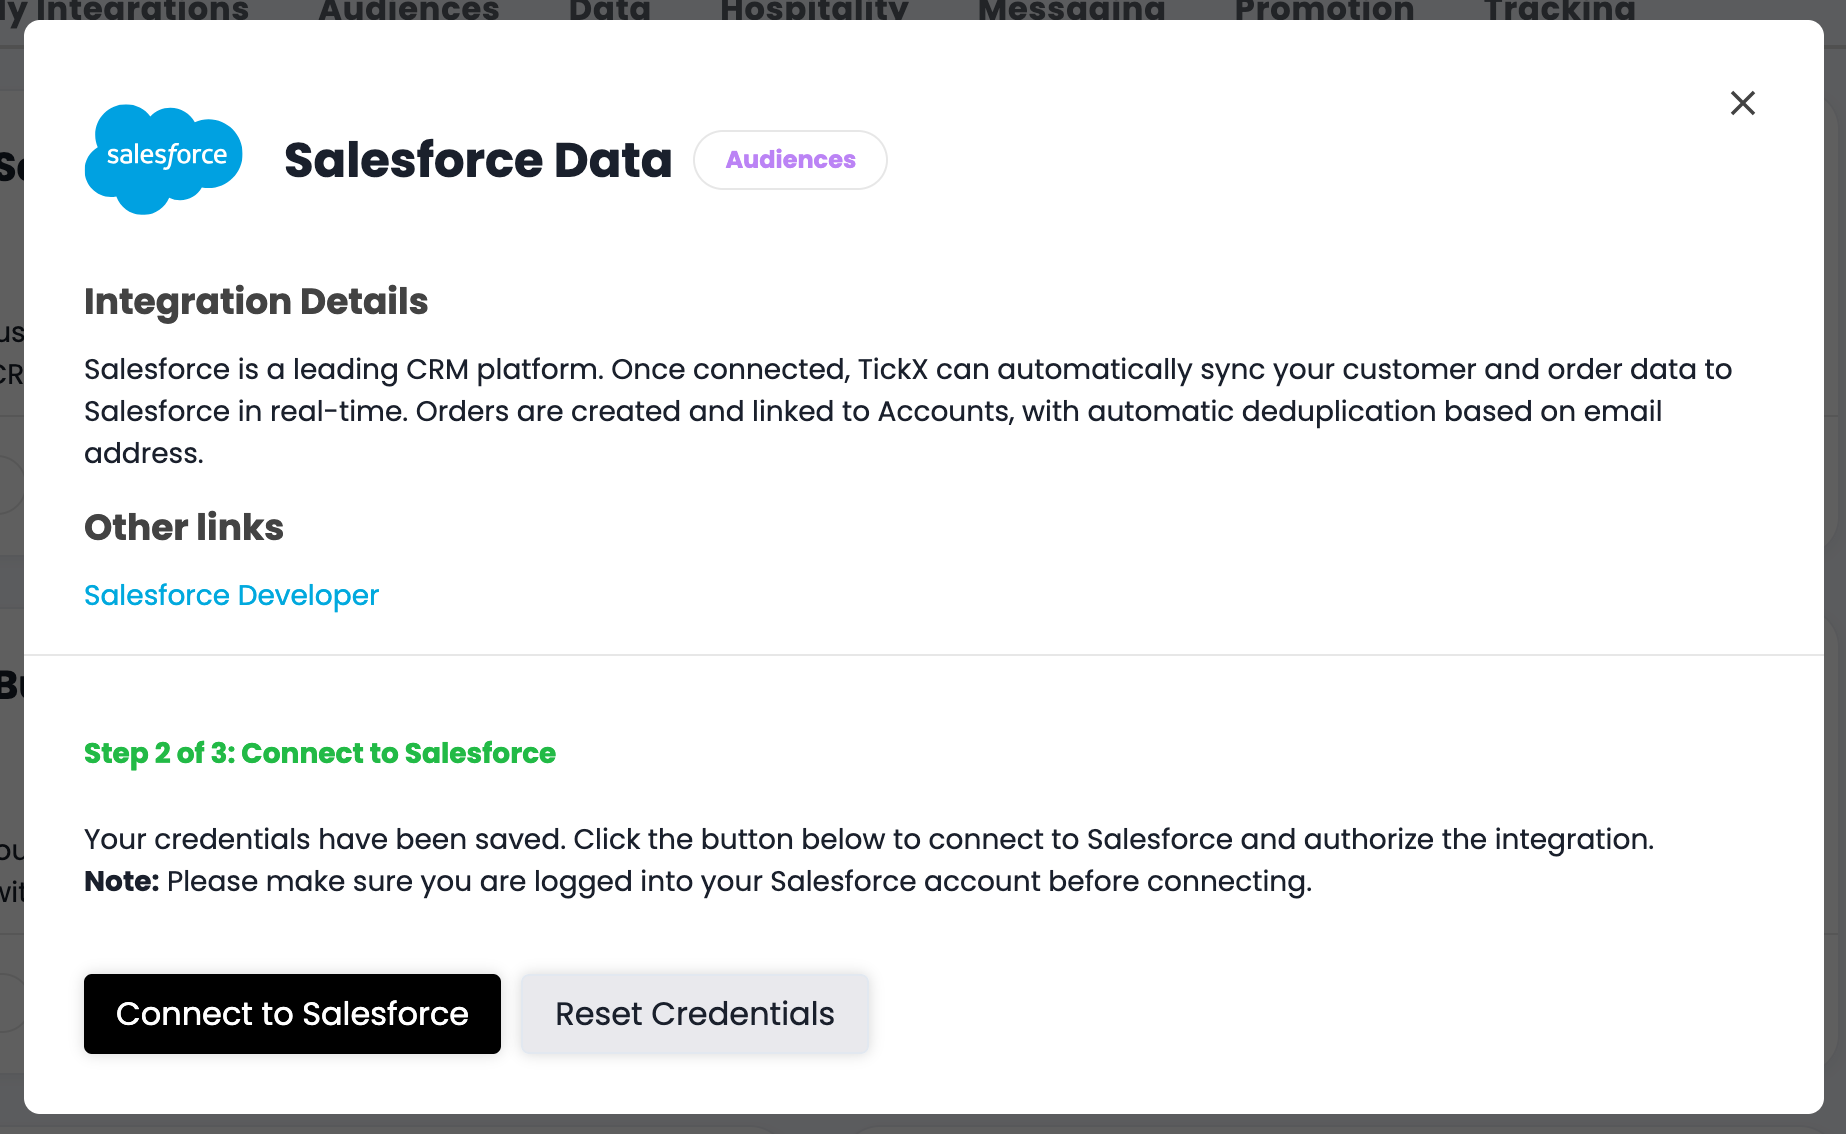
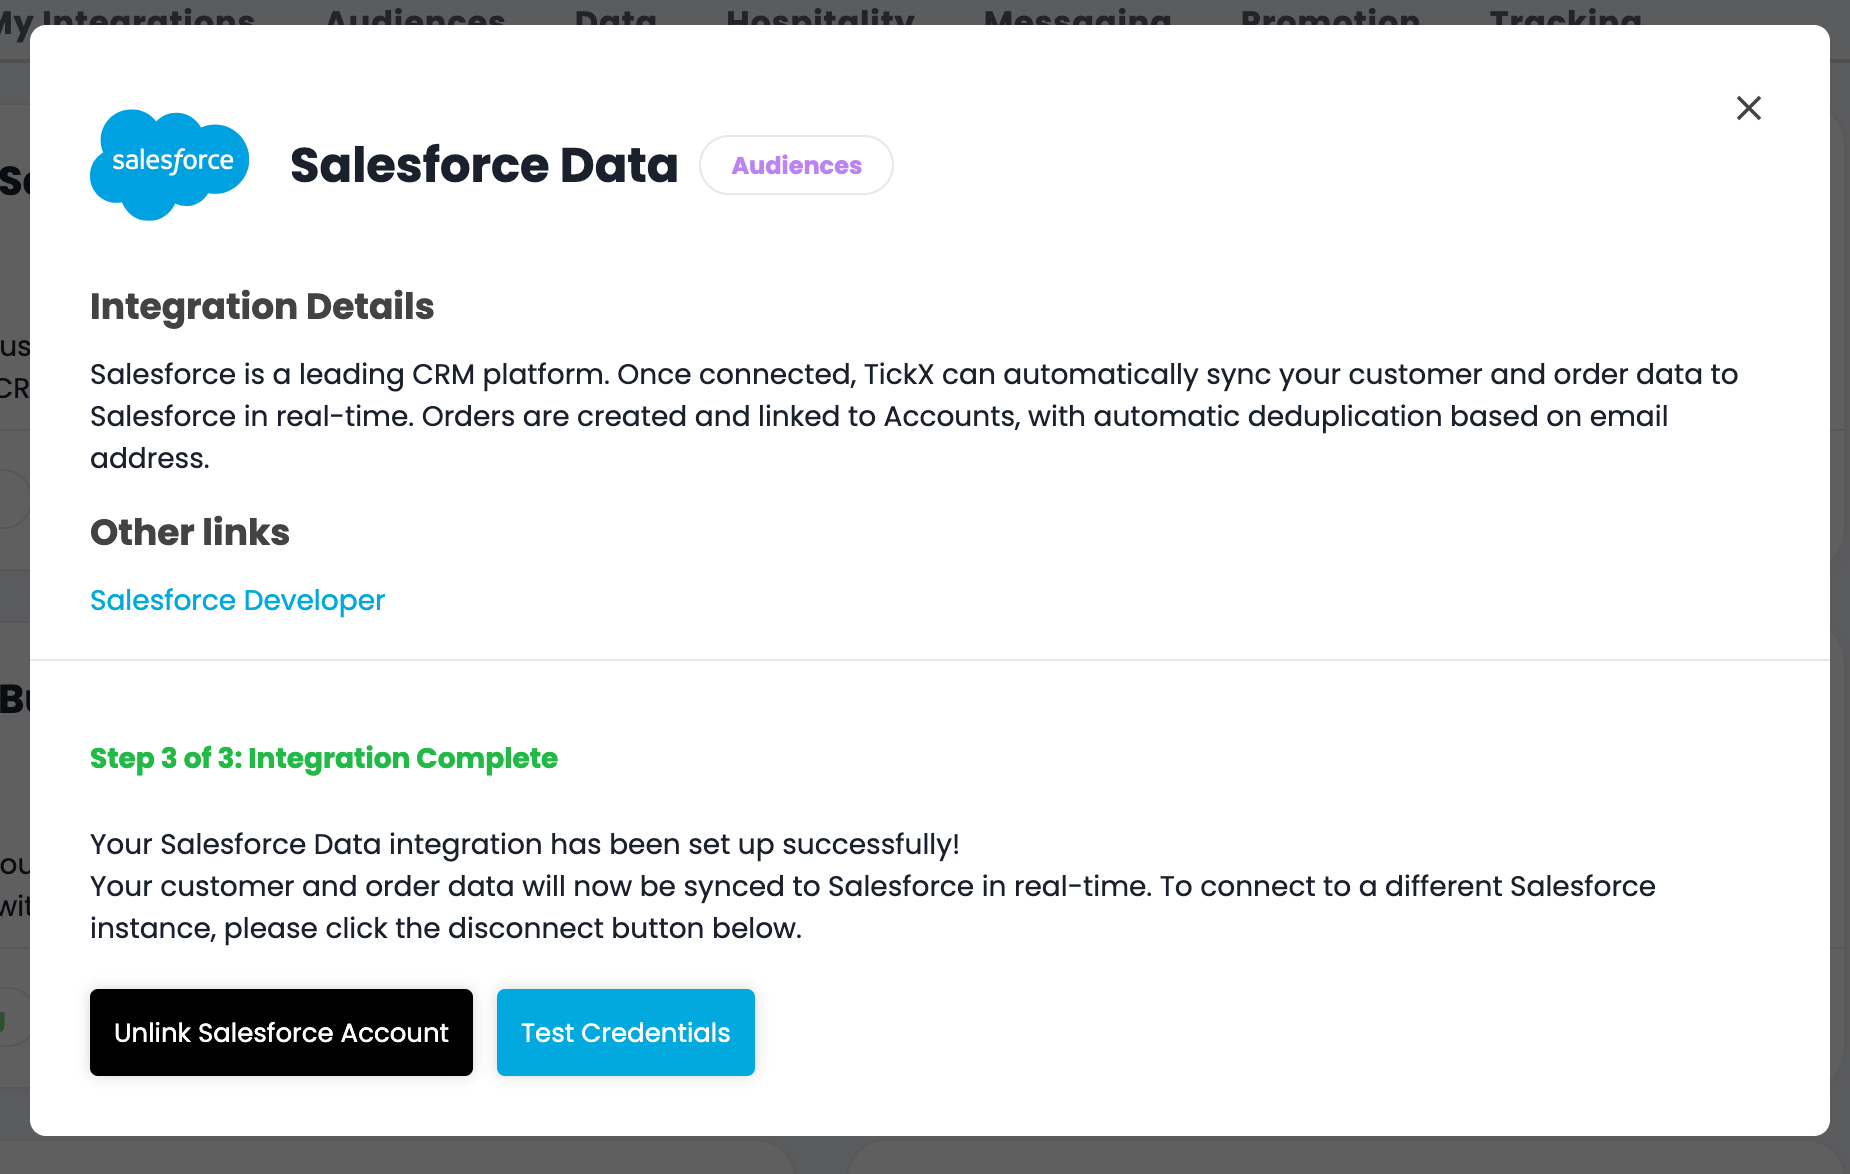
Your Salesforce Data integration is now configured, if you experience any problems with data syncs then use the Test Credentials button to ensure the connection is still valid. Un-link & Re-link if the credentials gives back any error messages.