This guide explains how TickX labels can be added at multiple touchpoints, such as the calendar and ticket selection stage to highlight important information and strengthen messaging throughout the booking journey. It covers common use cases, including calling out key dates, identifying dark days, highlighting special performances, marking seasonal changes, showcasing best-value dates, communicating ticket benefits, reinforcing restrictions, and promoting savings. The guide also outlines accessibility considerations, best-practice recommendations for wording and colour contrast, and how to add these within TickX IQ or through your Account Manager or TickX Support Team.
Getting Started
TickX provides you with the flexibility to add labels at various touch-points through the customer journey. This helps to encourage sales, call out key dates and give the customer additional information.
What are Calendar Badges?
You can add badges both at the calendar and (for timed entry experiences) at the ticket selection stage.
This means you can provide some additional context throughout the booking journey, with this flexible, and on-brand feature.
Using Calendar labels
Our partners use calendar labels for a variety of reasons, which are highly effective.
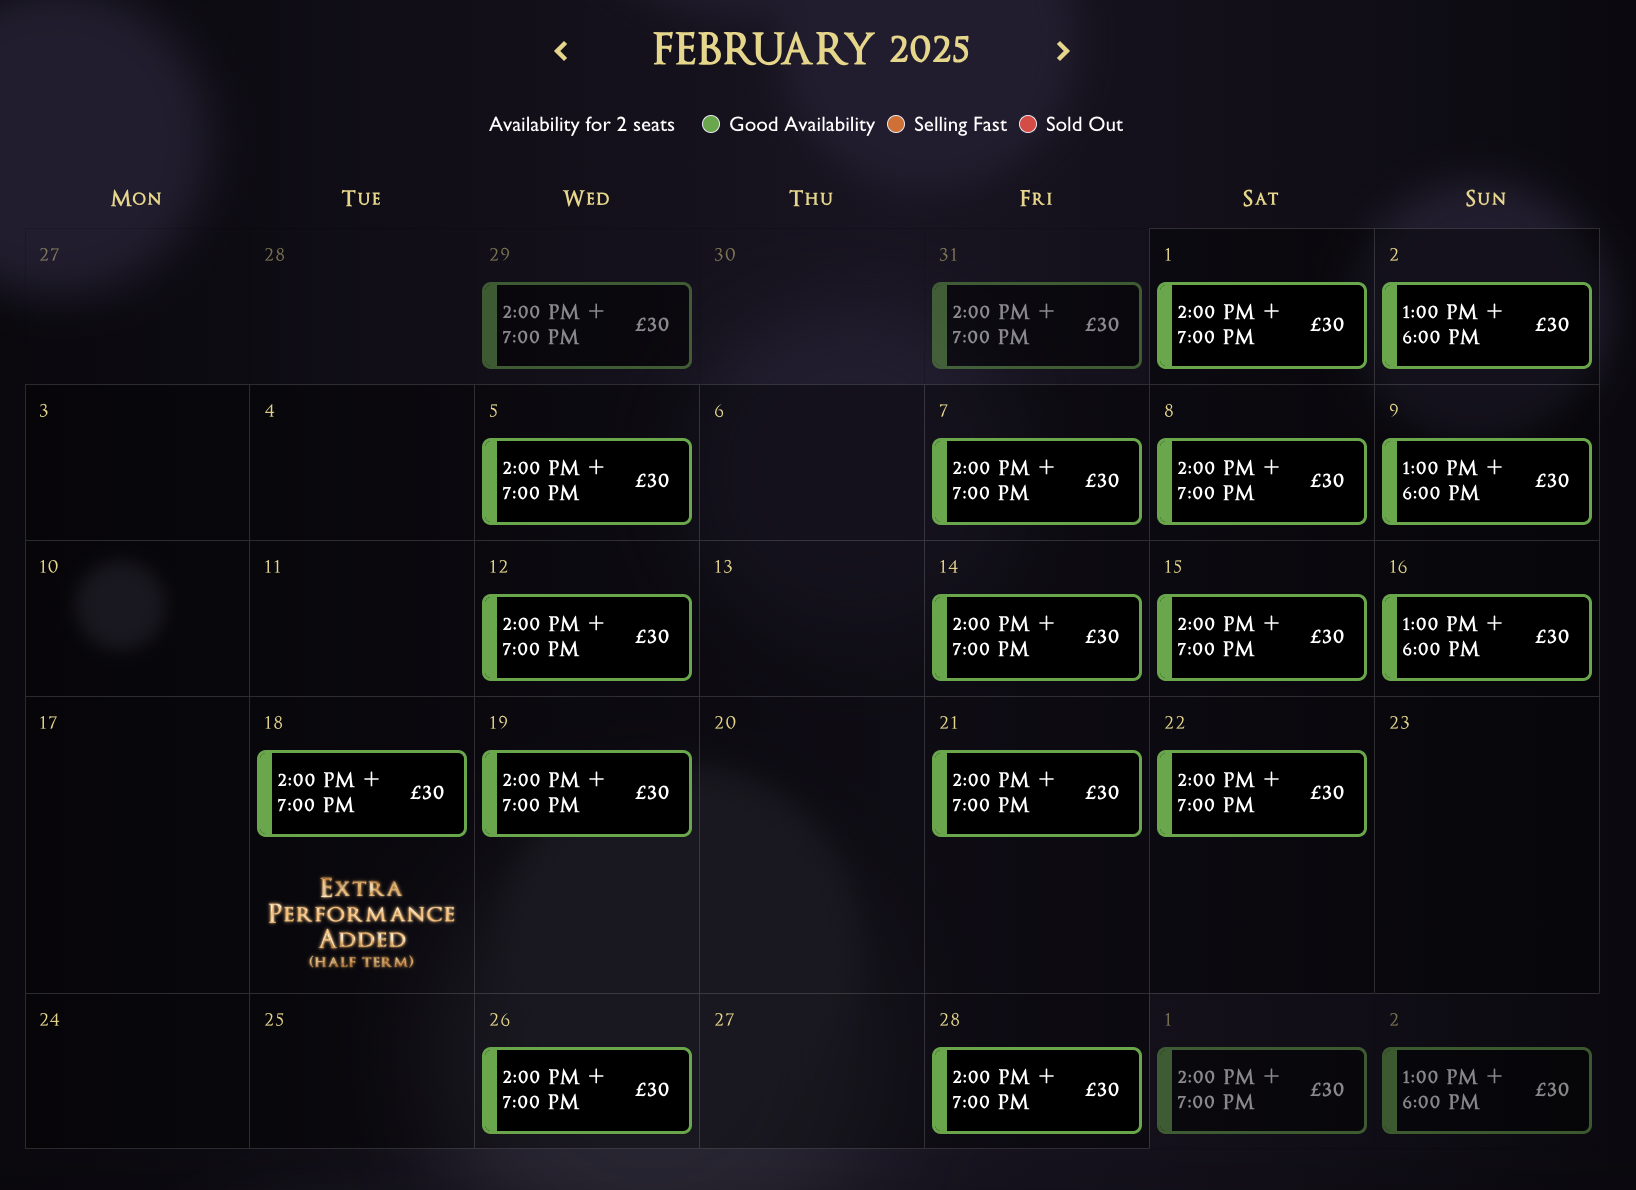
1. Calling out key dates
In the example below the client is using a graphic to show where an extra special performance has been added.
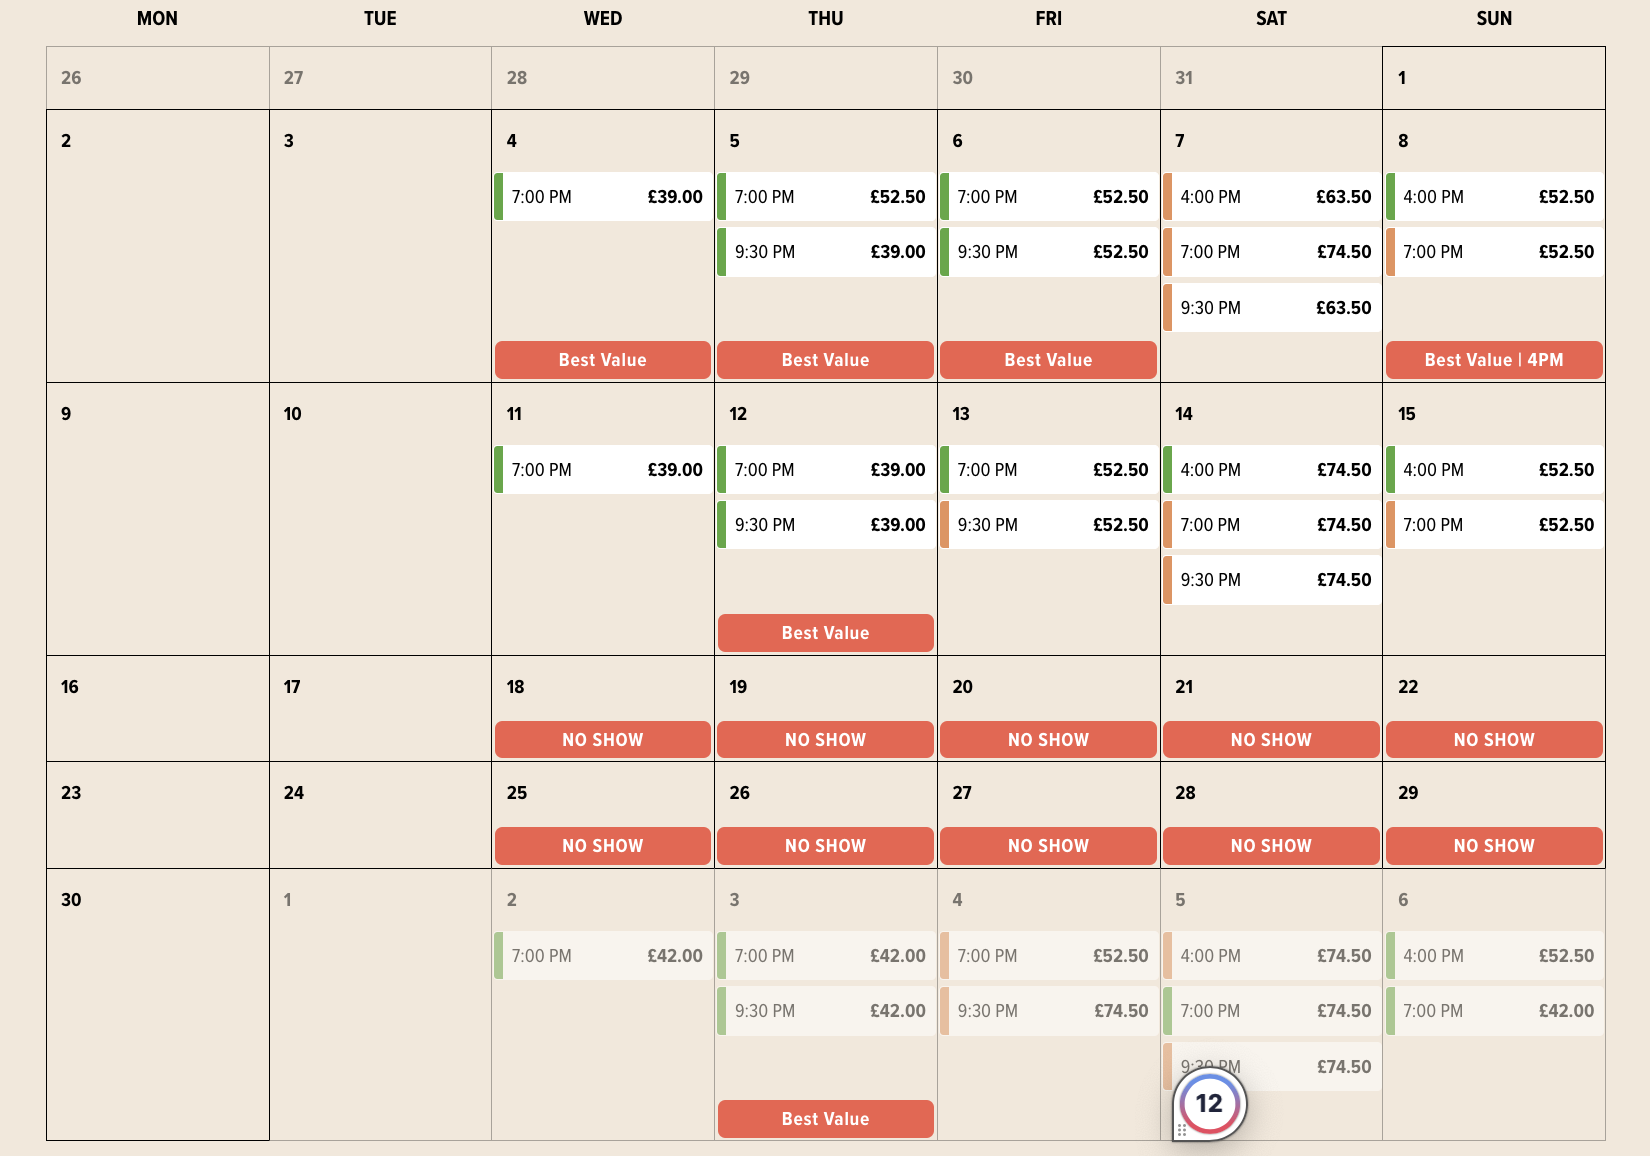
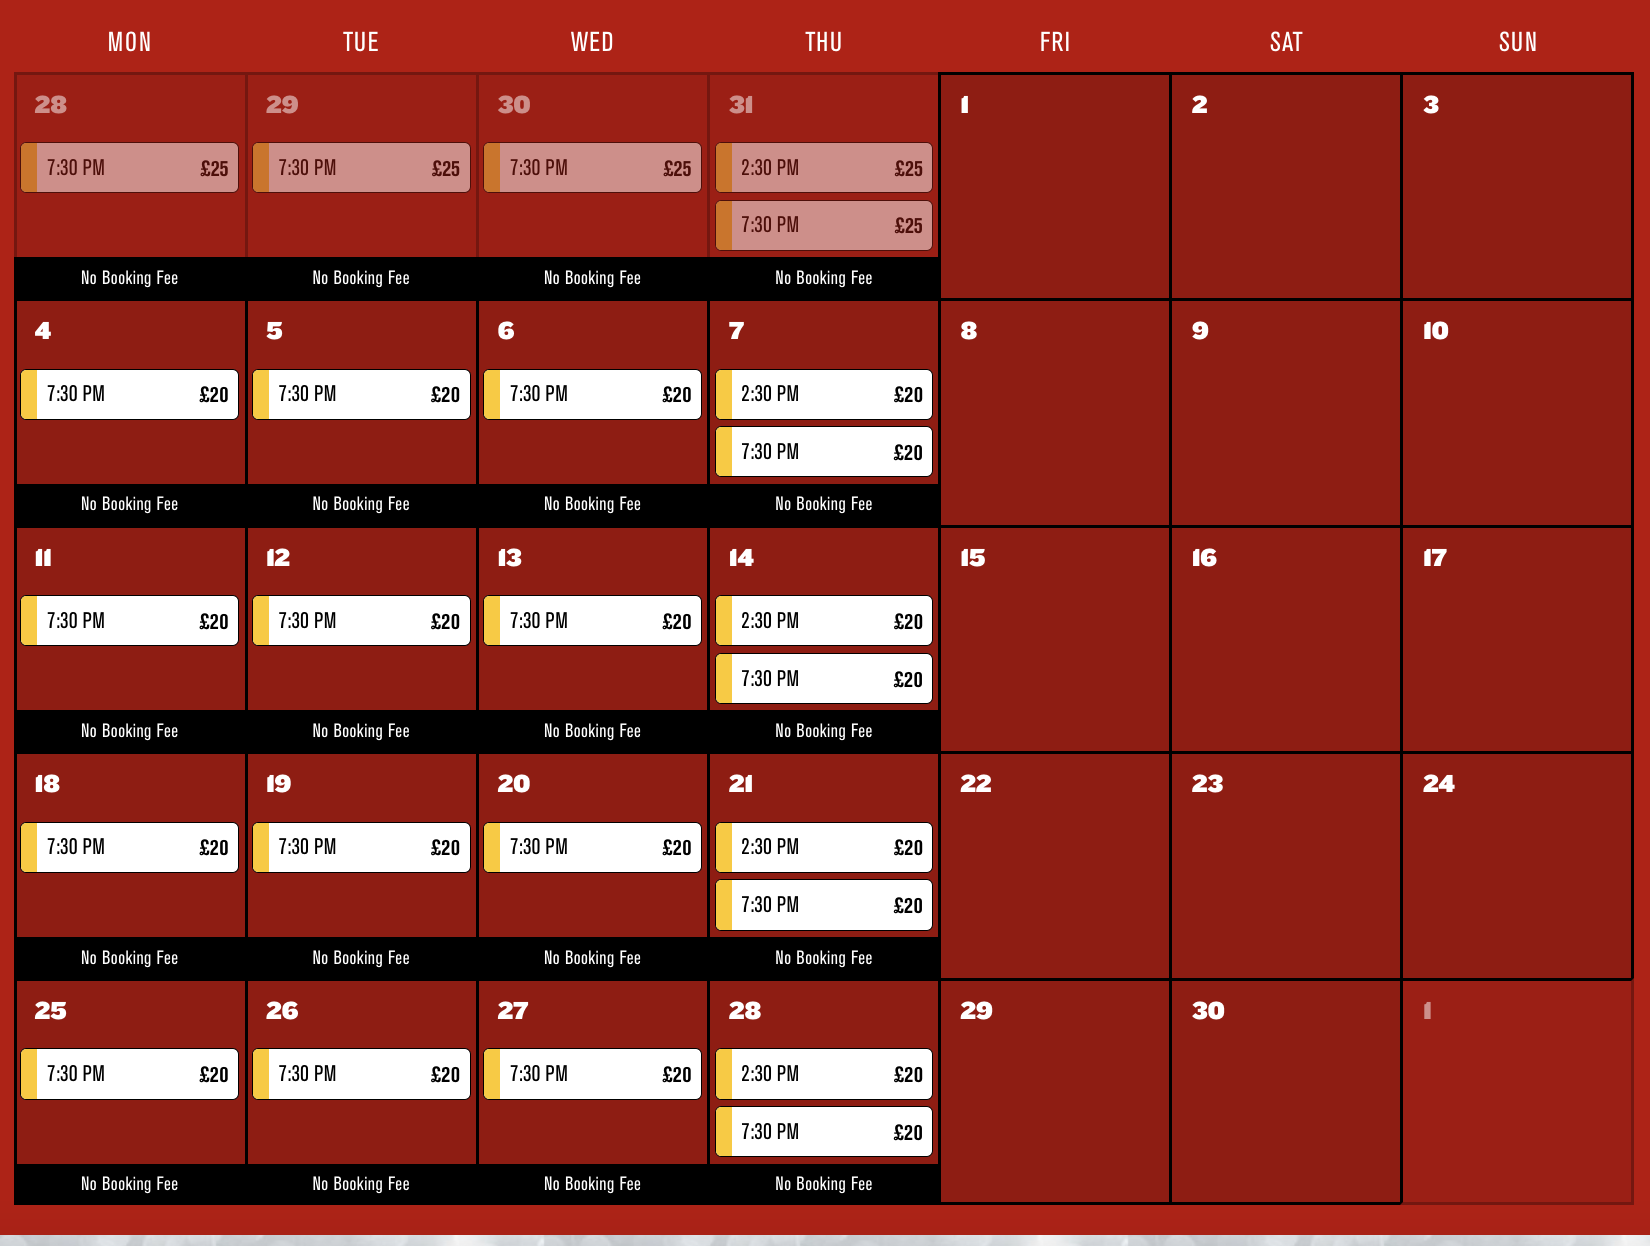
2. Providing information about when there are 'dark days' or days with 'no shows'
In the example below the client is clearly labelling where there are no shows to avoid customer confusion. They also have additional labels highlighting the dates that are best value.
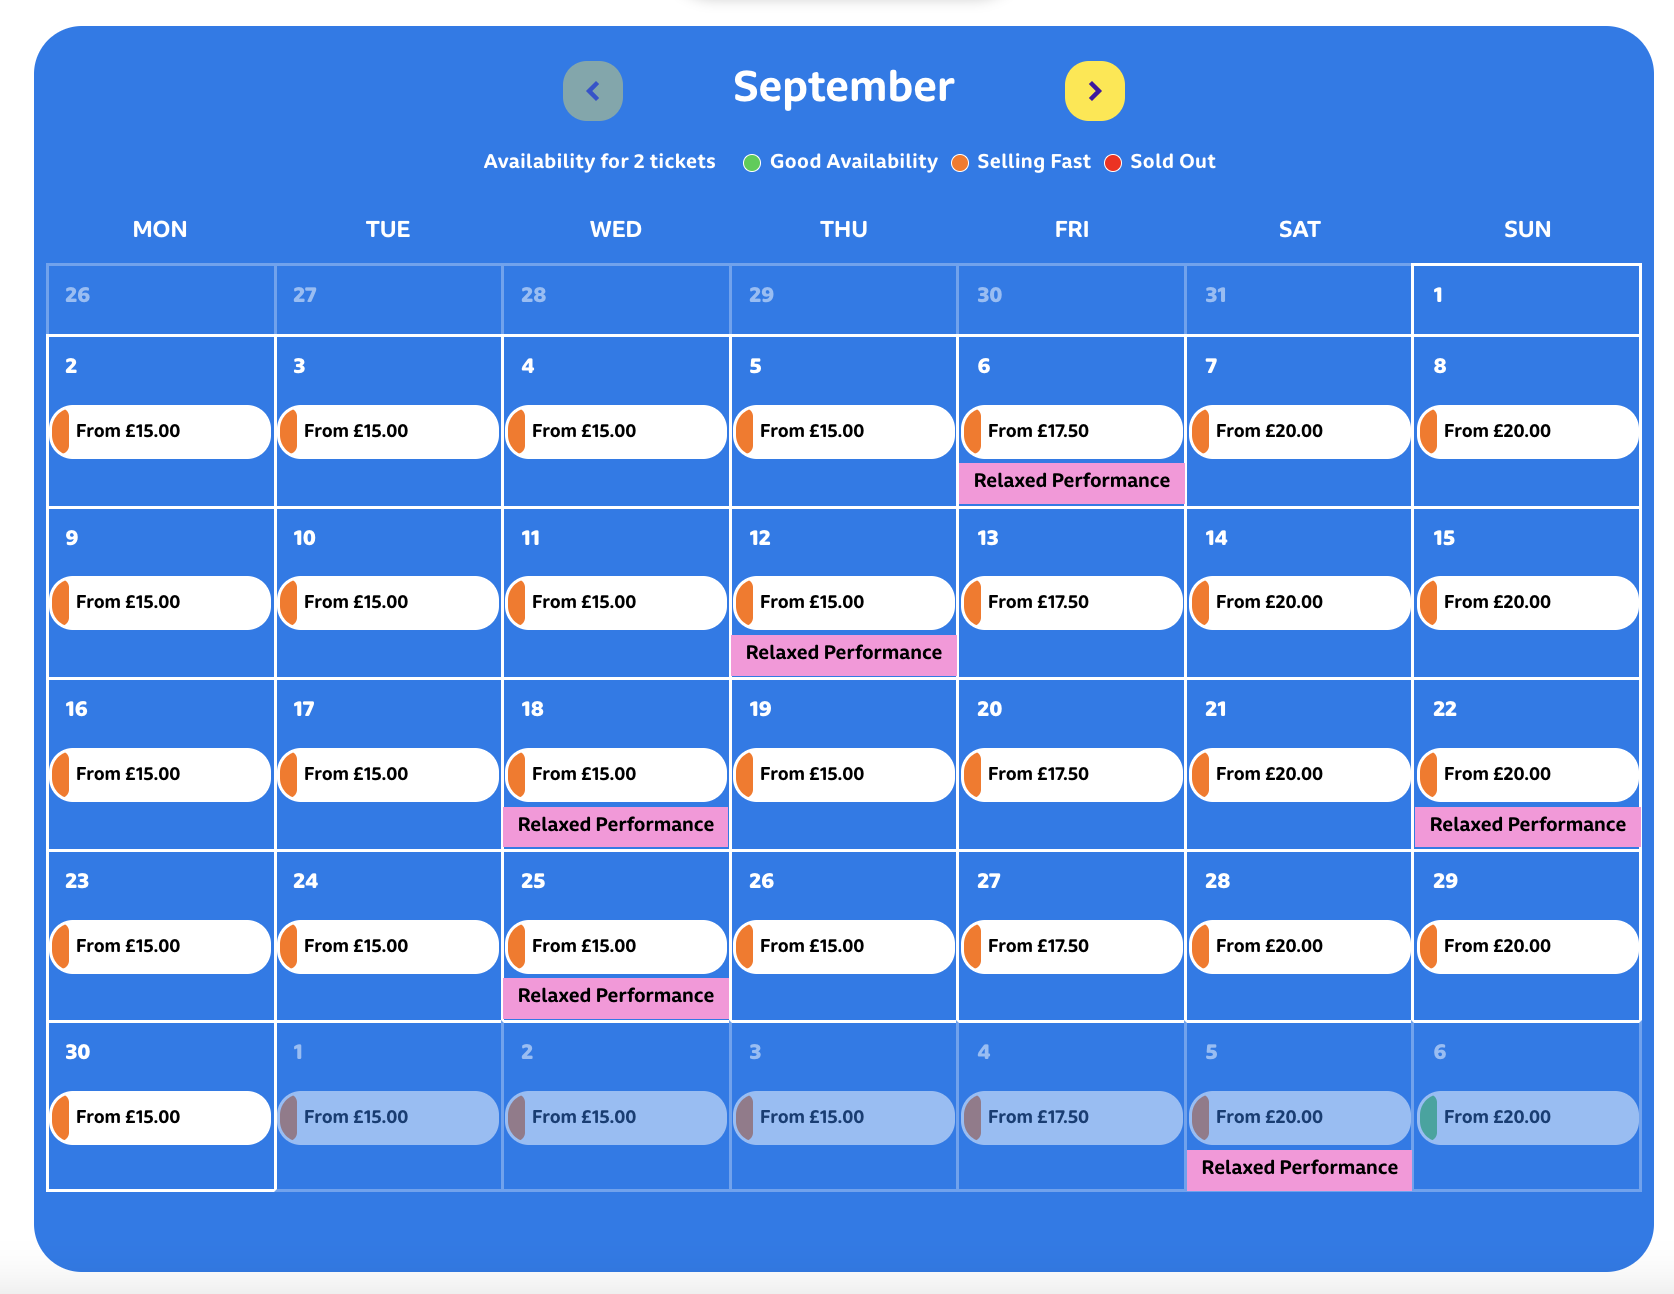
3. Providing information up front about special performances
In the below it's clear to parents attending this children's experience when the relaxed performances are available.
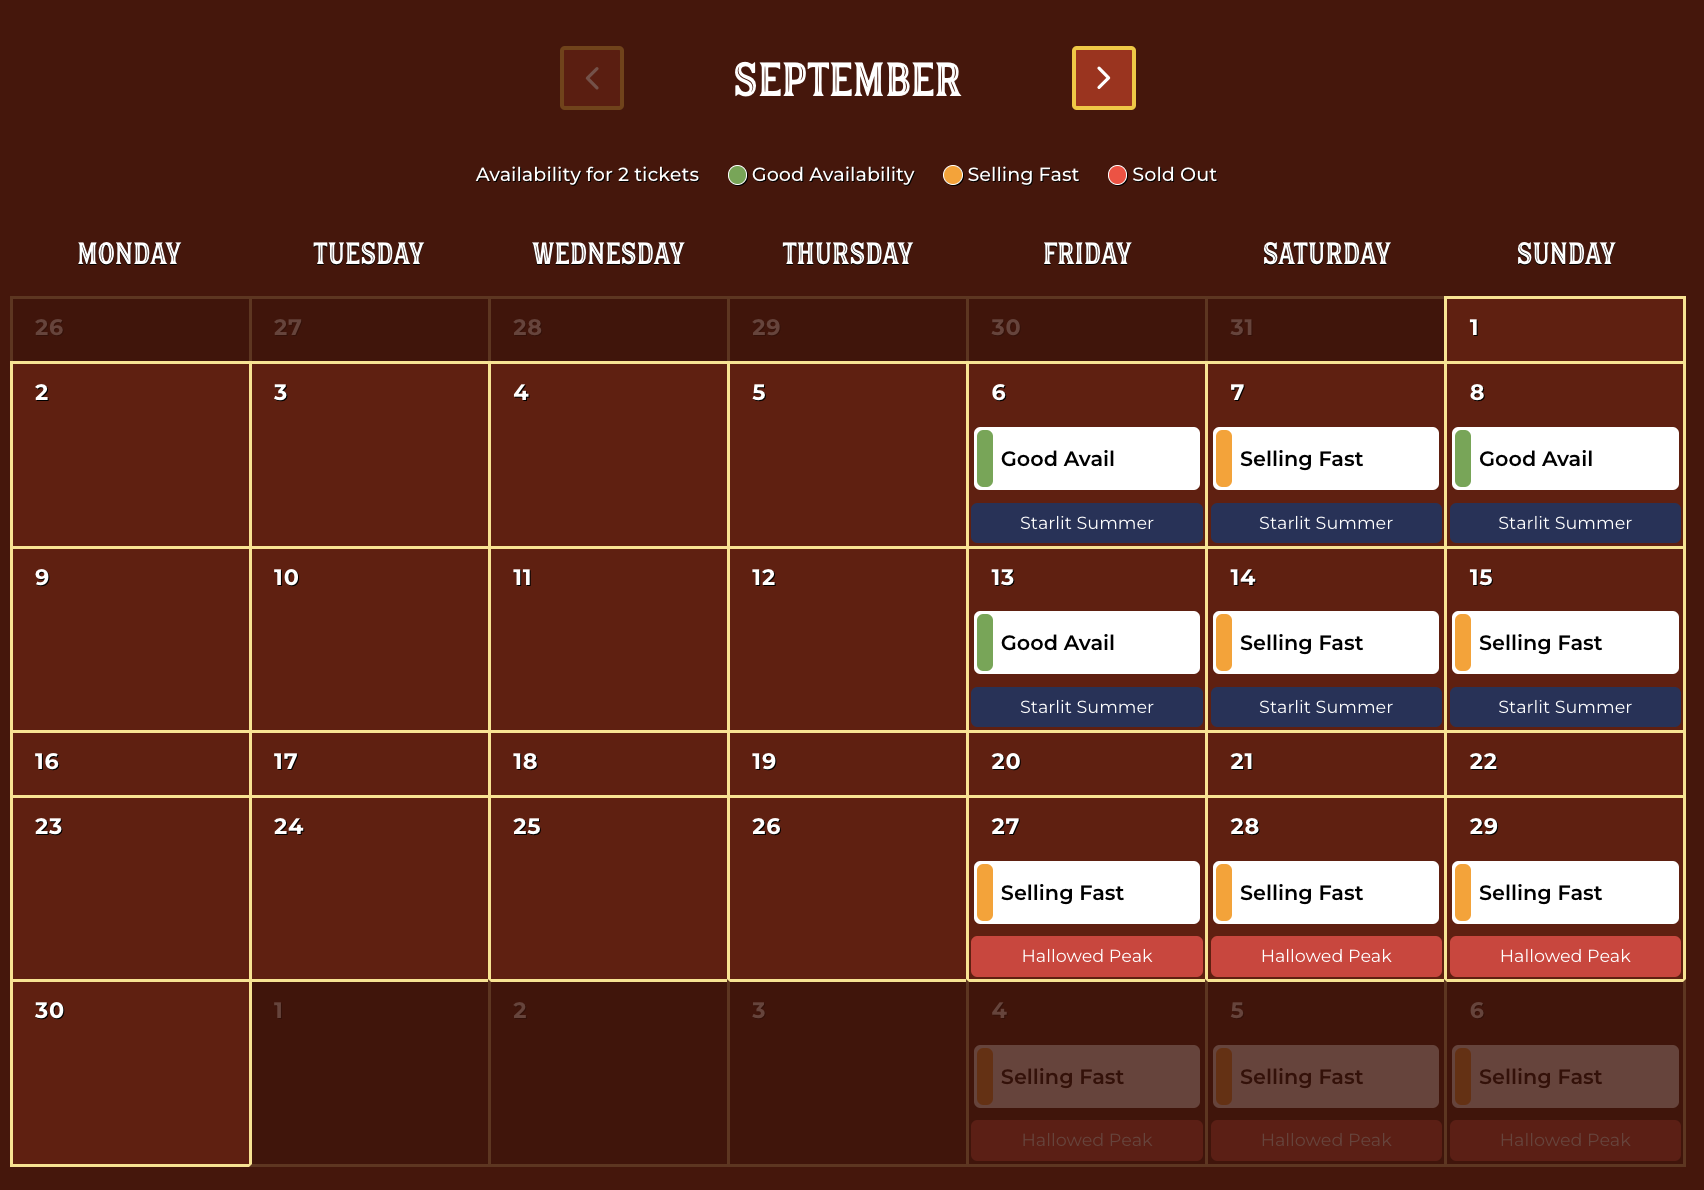
4. Showing when one season of shows ends and another begins
With the below example you can see when the summer season ends and the Halloween season begins, using different core colours to clearly show the difference.
5. Showing when the best priced tickets are available
In the below example the client is using no booking fee messaging to encourage customers to book further in advance and help build their advance.
Using Ticket labels
TickX also provides our timed entry clients with the opportunity to add labels at other touchpoints, including the ticket selection step.
You might use these to help sell the benefits of each ticket or convey key information to the customer.
You can see some examples below:
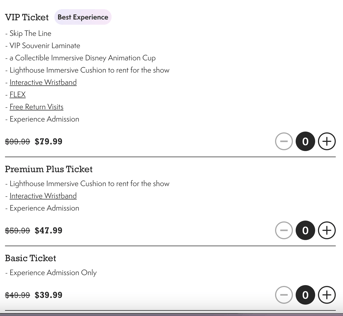
1. Selling the benefits
In the example below the client calls out the VIP Ticket as the Best Experience. We know from testing that adding in these touchpoints helps encourage conversion and upsell.
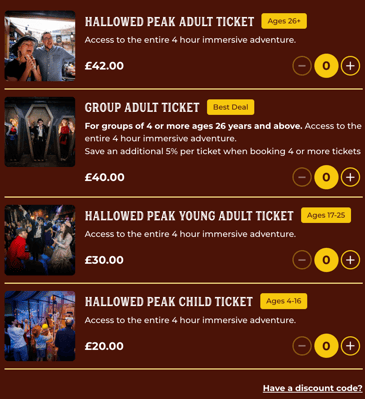
2. Providing information to the customer
The below client is communicating the age restrictions of each ticket type via labels. You could also add additional information such as 'ID required' etc.
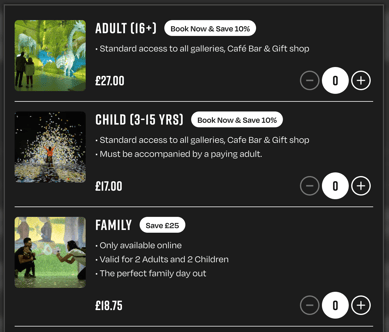
3. Highlight savings message
The below client has a saving for web sales vs on the door so that is communicated via labels at the ticket selection step.
How do I enable calendar labels or ticket labels?
Calendar Badges can be supported in the following ways:
-
As plain text on desktop and mobile devices
- As an image on desktop only
To add your own text based badge, you can do this within TickX IQ:
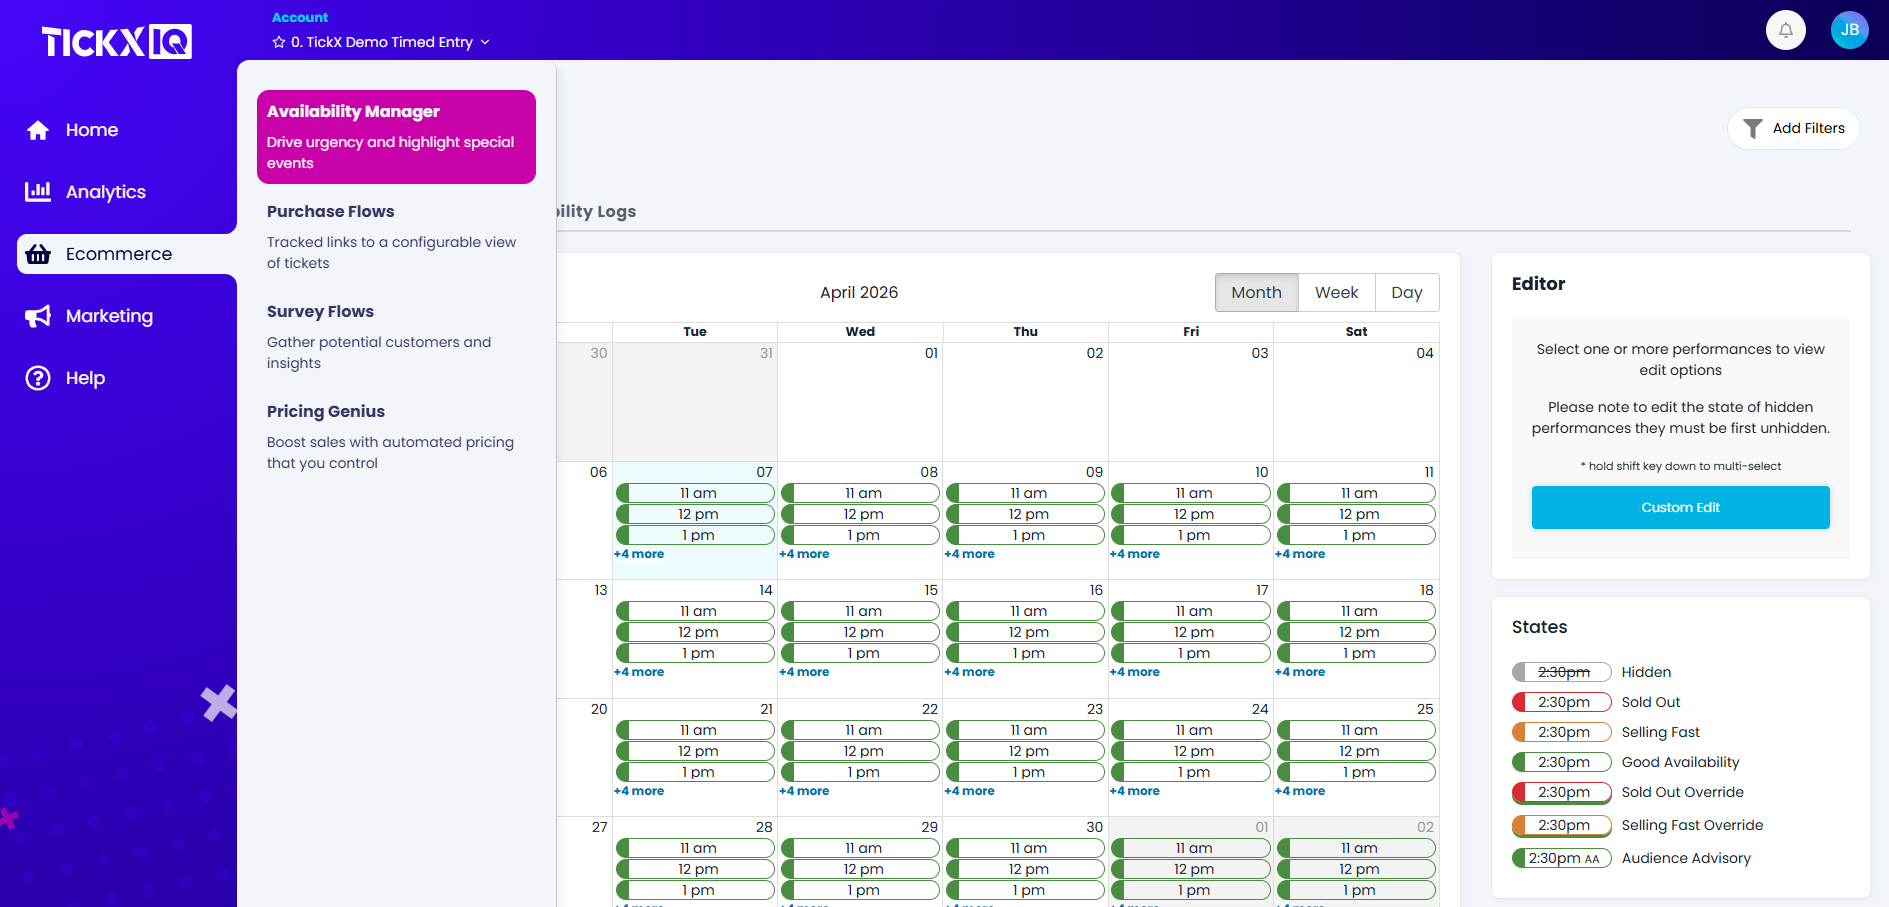
1. Ecommerce > Availability Manager
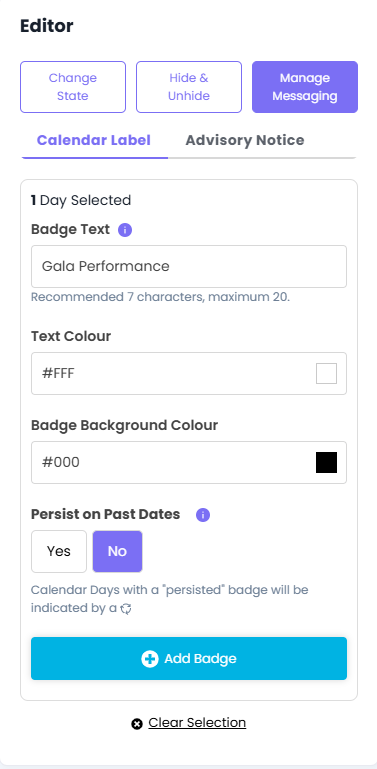
2. Select the desire date within the calendar and select 'Manage Messaging'
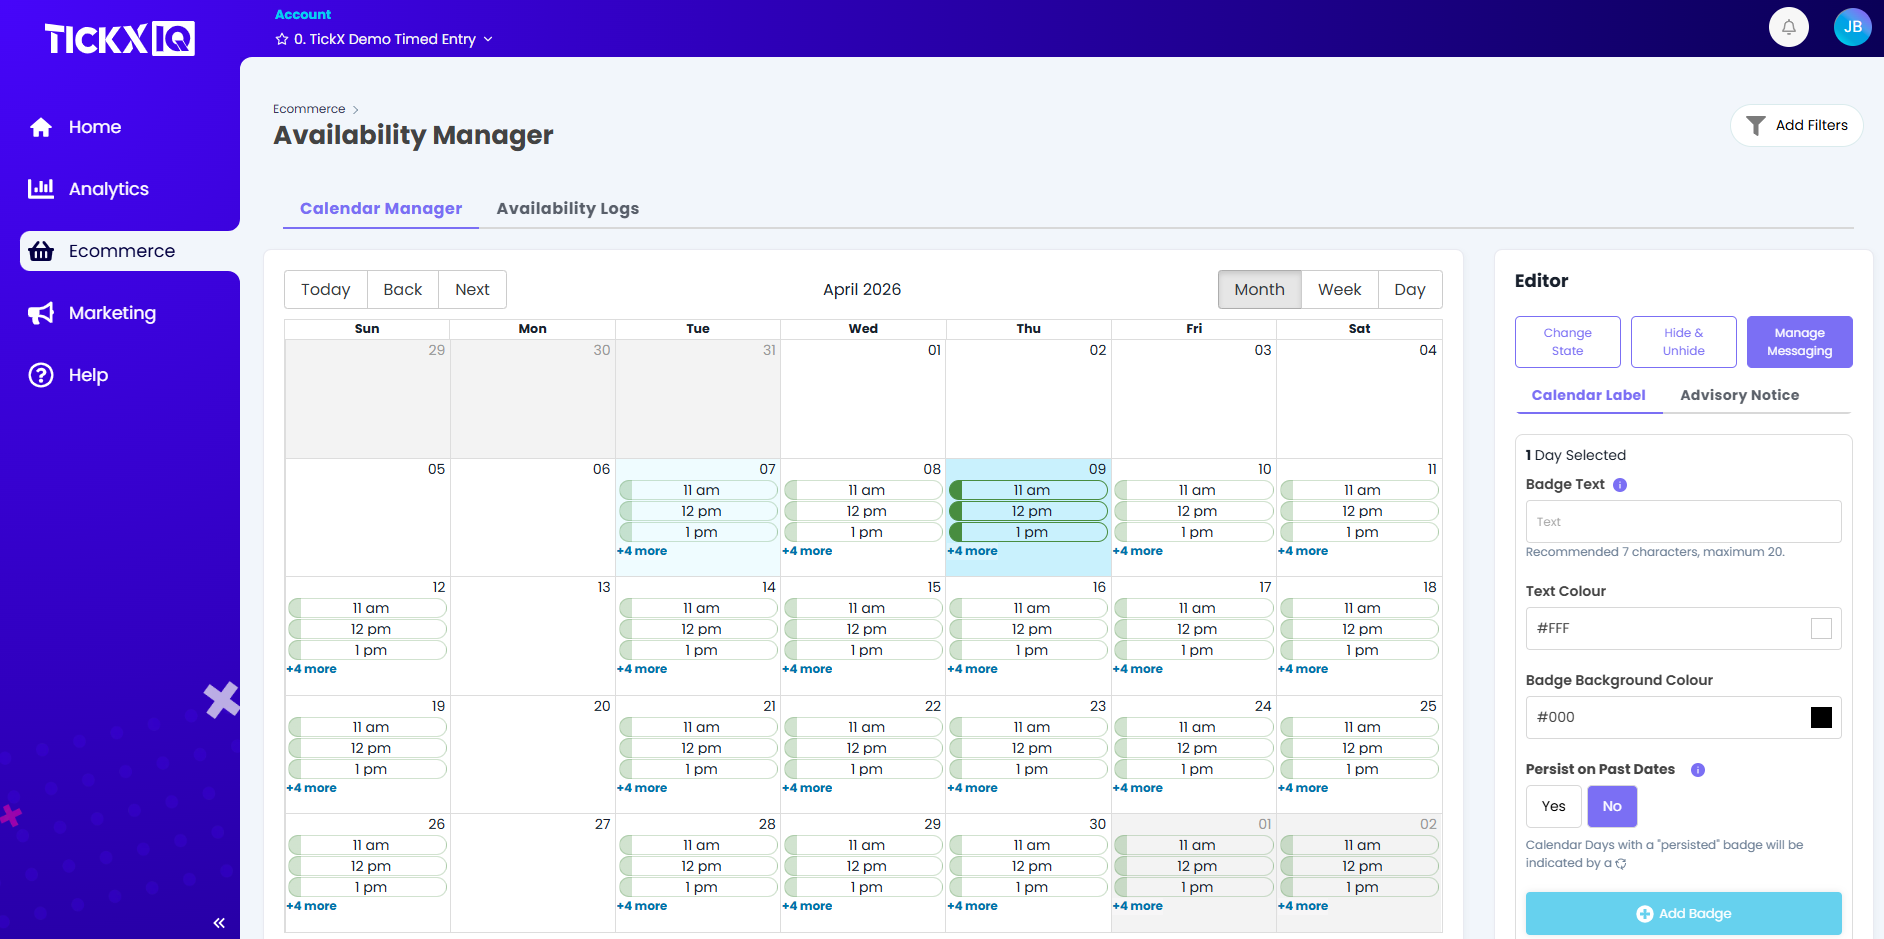
3. In the Editor, enter the desired badge text, set background colour and font colour then select Add Badge
Note: If selecting 'Yes' to the 'Persist on Past Dates' setting, the badge will remain on the calendar even once the date has taken place.
If you would like to use an image for your calendar badge, you will need to email your account manager or support@tickx.com with your asset. The spec for this image is recommended at 1080(w) x 270(h) px.
Please note you should be aware of colour contrast for accessibility and also keep labels (especially at calendar) short enough that they do not get compressed on mobile. Your account manager may suggest alternative wording or colours.