This guide explains how to create and manage purchase flows to customise customer journeys and control what users see from calendar through to checkout. It walks you through naming flows, filtering by dates, prices, ticket types, and performance tags, adding discount codes, and generating unique URLs or QR codes. You’ll also learn how purchase flows improve attribution, support website segmentation, power targeted marketing and CRM campaigns, and streamline operational uses like friends-and-family or affiliate tracking. The guide also covers how to measure flow performance through TickX IQ reporting.
What are purchase flows?
'Purchase flow' is the term we use to describe custom journeys through TickX from calendar through to checkout, which all sit on their own unique URL.
Purchase flows can be set up to display exactly what you want the customer to see at the calendar or seat map stage.
You can segment the purchase flows in numerous ways including:
- By date
- By time slot / performance
- By ticket type
- By part of house
- By ticket price
You can also add discount codes to purchase flows which apply automatically in the background.
Every purchase flow generates a unique URL which can be copied directly from TickX IQ.
This means purchase flows can be generated quickly by anyone, and also that sales through purchase flows can be perfectly attributed in our dashboard.
Setting up a purchase flow
Step 1: Go to the Purchase Flow Builder.
- The Purchase Flow Builder can be found in TickX IQ under Ecommerce > Purchase flows.
- If you do not have access to your TickX Dashboard, contact your Account Manager.

Step 2: Add a new purchase flow
- Within the Purchase Flow Builder click 'Add new Purchase Flow'.

Step 3: Add Purchase Flow Name
- Give your Purchase Flow a clear name. This is used for internal reporting and will not be seen by customers. E.g. Mid-Week Under £60

Step 4: Determine the days / dates
- Select which performances / timeslots you would like to be included within your purchase flow. E.g. Only Mid-Week

Step 5: Filter by Price
- Select the pricing parameters you would like to include within your purchase flow. E.g. Only include tickets priced under £60

Step 6: Determine any Advanced Options
- We have a number of extra fields which you can filter down your purchase flows. These include any performance tags or ticket types that you may want to create flows for e.g. VIP only
- You can also add in any discount codes here if you would like to create a discounted specific flow

Step 7: Determine your Ticket Quantity
- You can configure the maximum & minimum ticket quantities allowed for this specific flow
- You can also set the default so that when a user first navigates to the flow that there is a default number of tickets already selected

Step 8: Set Flow to Active & Save
- Click 'Save' to create your new purchase flow. After, you will be directed back to the Purchase Flow landing page where your new flow will appear.
Step 9: Creating your URL
- Copy your unique "Config ID", highlighted in red, by clicking the copy icon next to it.
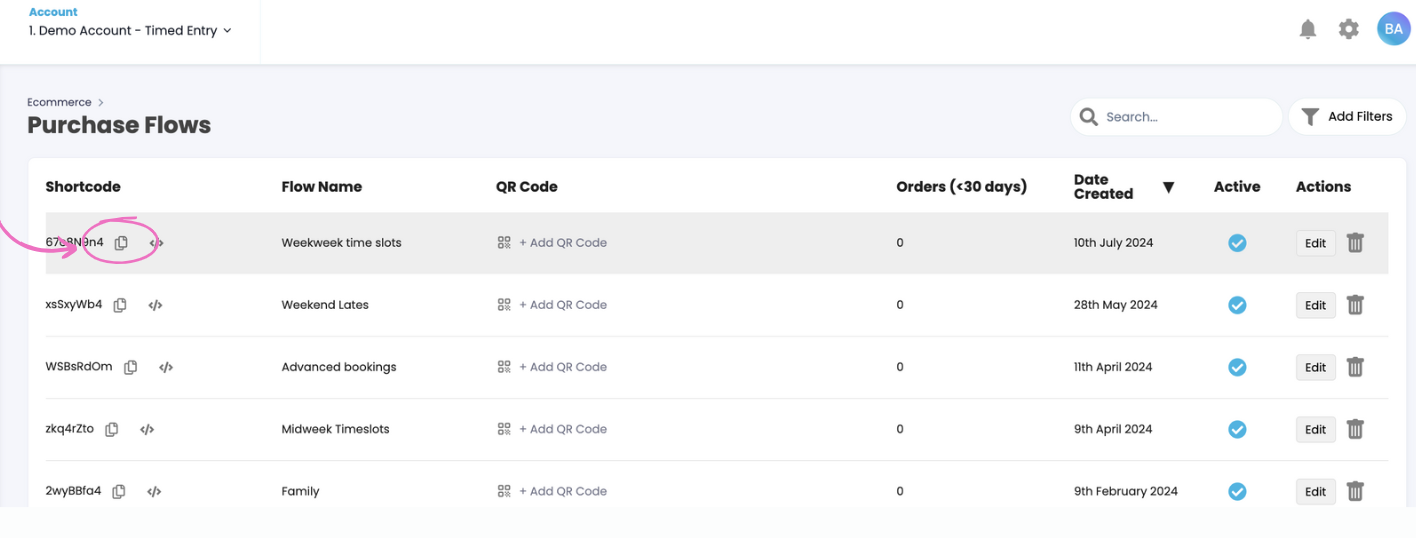
- This will give you a unique URL that you can paste directly in to your browser
(For example: www.demoproduction.com/tickets/?flow=8WtncBiC) - You will be able to check this is working as it will automatically pull through the criteria set in the purchase flow.
- You can click Add QR code which will generate unique QR code which will take customers directly to that link. You can learn more about this here.
Making the most of Purchase Flows
Discount Codes
👍 A great way to incentivise customers without actively asking for a discount code is to use purchase flows which auto-apply the codes in the background.
To set up the discounted purchase flow you will need to:
- Set up your discount. You can follow the guide here.
- Go into 'Advanced Options' on the Purchase Flow Builder
- Enter the discount code into the field
- Add any other parameters such as time of performance, price etc.
- Create the unique purchase flow
Our partners have used this functionality for numerous use cases including:
- Discounting booking fees for advanced bookings
- Giving existing customers a discount to other productions in their portfolio
- Discounting mid-week performances to drive sales for difficult to sell times
- Using discounted booking flows to encourage customers to 'refer a friend'
Website segmentation
Some of our partners use segmented purchase flows to give their customers a choice of checkout experience from the show website's home page. We would usually recommend four buttons, with one of them directing to 'All tickets'.
Examples of flows used are:
- See it this week
- Best availability - mid week seats
- Premium seats - Band A & Band B
- Affordable tickets
- Matinee tickets
- Advance bookings - no booking fee
You can see more information about how partners embed the TickX widget here.
Marketing and CRM
Our purchase flows can also be used to facilitate particular marketing messages.
Some examples of this are:
- Showing only the affordable seats through social media targeting students
- Sending emails to existing high-spending customers with only the premium seats
- Sharing a discounted flow with certain groups you are keen to encourage to attend the theatre - for example to improve diversity
Other operational uses
Our purchase flows can also help with operational processes for example:
- Providing discounted / free tickets to friends and family or press nights
- Clearly attributing affiliate revenue by providing them with a unique link
Measuring purchase flow performance
📈 We measure sales through every purchase flow which can drive actionable insights in our dashboard.
You can segment the entire dashboard by individual purchase flow which will allow you to see performance by various metrics including:
- Sales
- Average order value
- Days till performance
- Part of house and ticket type
You can segment these here:
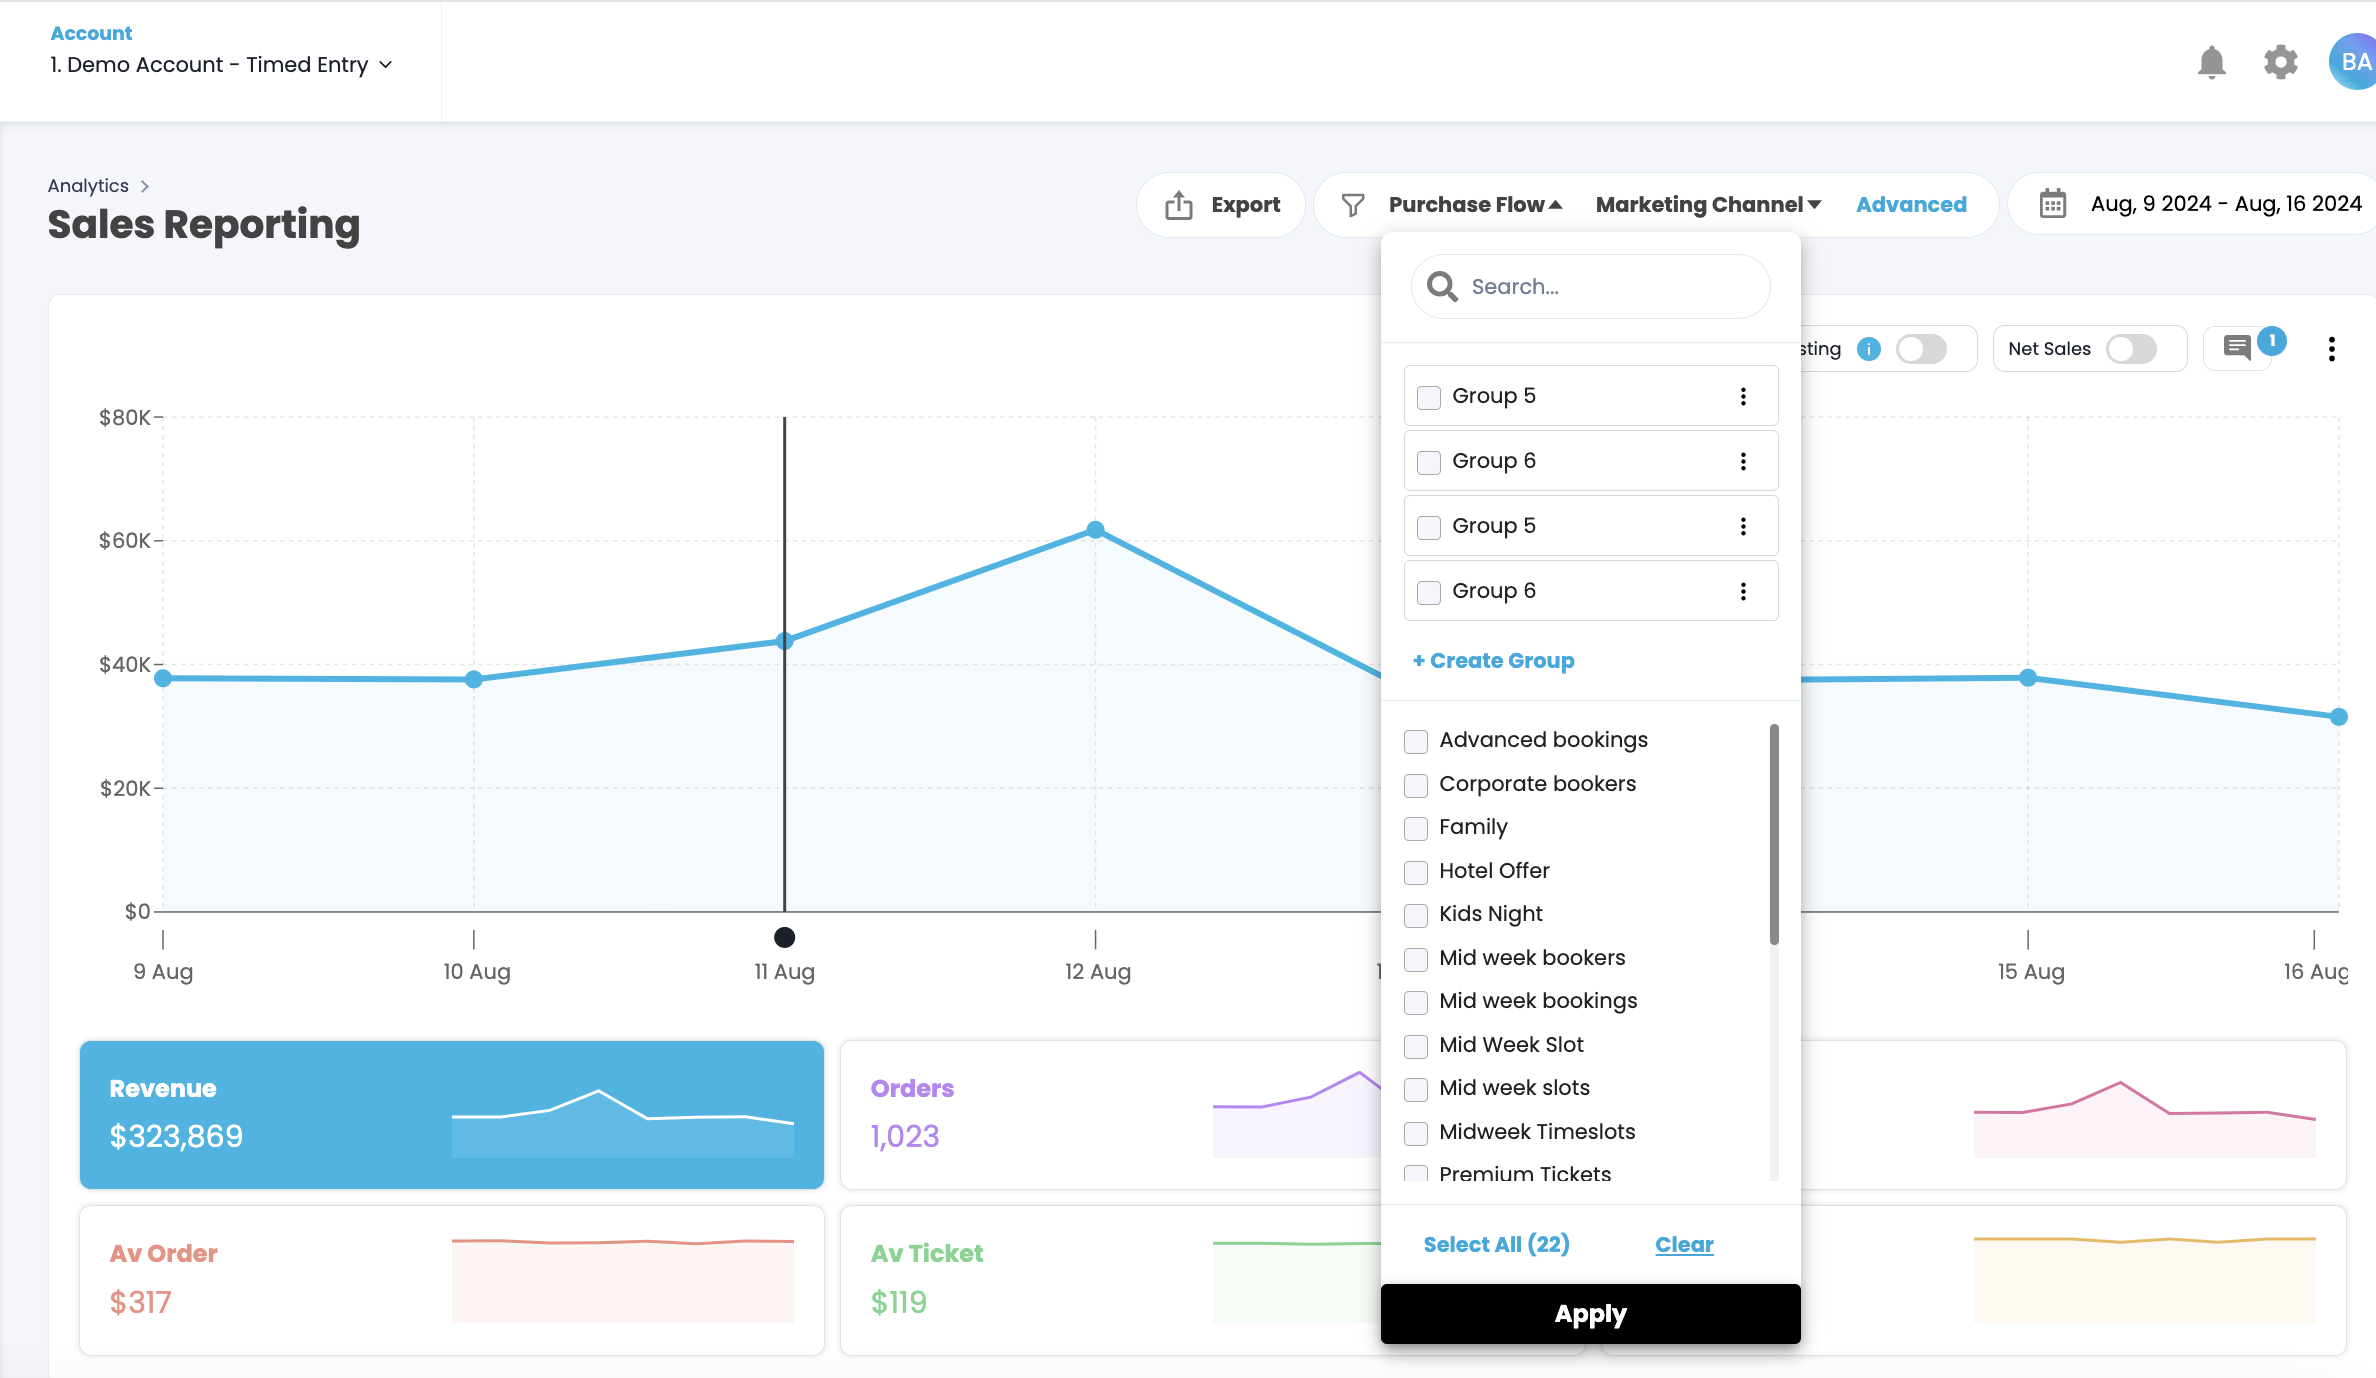
There is also a specific report for purchase flows which can be found under the main graph in the 'Flows' tab. This also gives you more information about how each flow funnel is performing.